
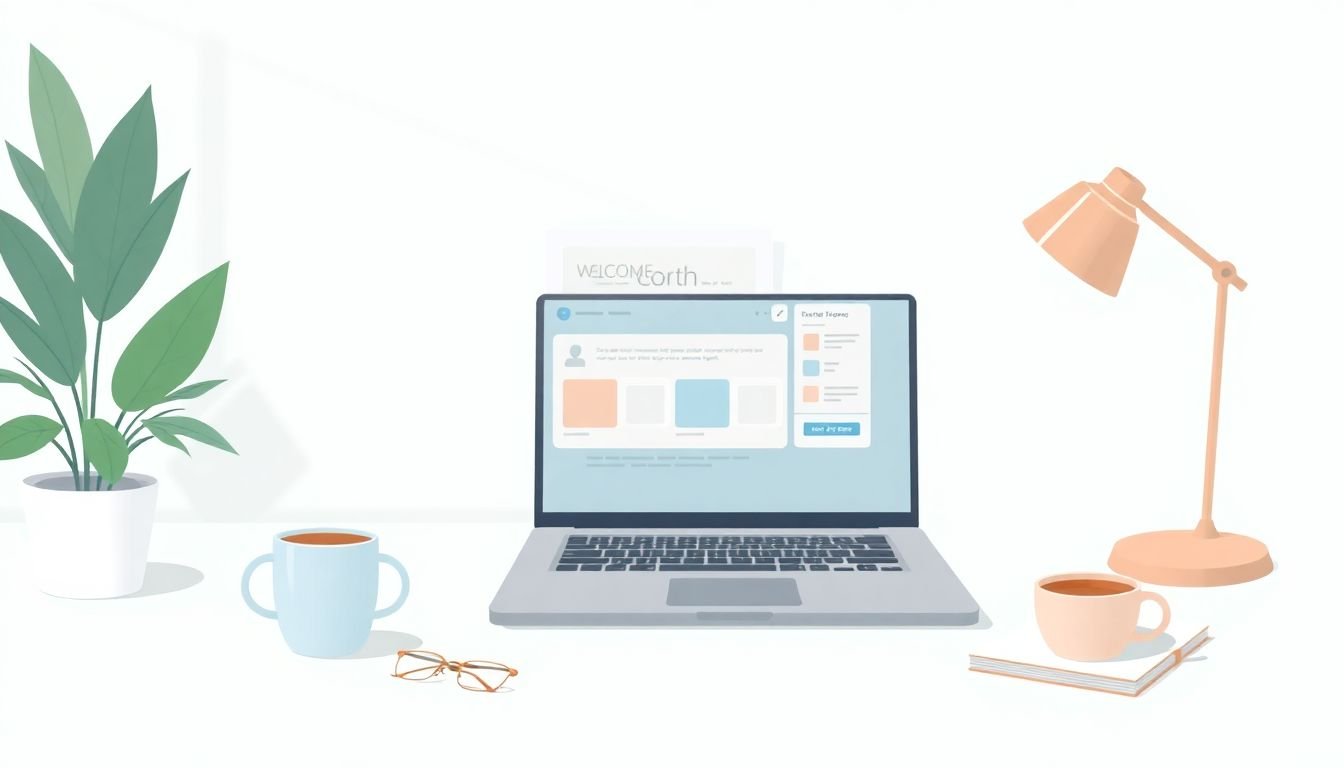
How To Create Onboarding Lessons for New Students in 9 Easy Steps
When I onboard new students, the hardest part usually isn’t teaching content. It’s helping them feel oriented—fast. And honestly, it’s overwhelming for both sides. Students are juggling new expectations, new platforms, and a bunch of “where do I even start?” moments. Teachers end up answering the same questions over and over, and nobody’s learning anything during the confusion.
So I started building onboarding lessons as a real mini-course: clear outcomes, a predictable schedule, and activities that prove students can actually do the job (or pass the course) by the end of week one. If you do it this way, onboarding stops being a pile of videos and becomes something students can succeed in.
In the sections below, I’ll walk you through how to create onboarding lessons for new students in 9 easy steps—and I’ll include a fully worked example lesson plan with timings, assets, assessment, and a feedback loop you can reuse.
Key Takeaways
- Define onboarding outcomes with measurable success criteria (what students can do, not just what they’ll “learn”).
- Map a structured learning path that moves from basics to role tasks, with logical prerequisites and short assessments.
- Reduce friction in enrollment by using single sign-on, automated account setup, and a single “start here” page.
- Personalize onboarding using placement checks, optional modules, and different content formats for different learner needs.
- Include practical, job-like activities (simulations, case studies, role-playing) so students build confidence early.
- Use technology (LMS + knowledge base + chat support) to centralize resources and answer common questions quickly.
- Build community with buddy systems, structured introductions, and small group discussions that create real connections.
- Collect feedback at specific moments (day 3, week 2, end of onboarding) and turn it into concrete changes.
- Plan ongoing support beyond the initial onboarding window with office hours, refresher paths, and progression check-ins.

1. Create Clear Onboarding Goals and Success Criteria
Before you build lessons, decide what “done” looks like. I usually start with a single sentence like: “By the end of onboarding, students can complete X task without help.”
Here’s the difference that matters: goals tell you where you’re going. Success criteria tell you how you’ll prove you got there.
What to produce (artifact)
- Onboarding goal statement (1–2 sentences)
- Success criteria list tied to specific skills and behaviors
- Assessment plan (quiz, performance task, checklist, or rubric)
How to produce it (process)
- Pick 5–8 skills students must demonstrate early (not 30 items—keep it tight).
- Write each success criterion in observable terms: “can,” “will,” “demonstrates,” “submits,” “solves.”
- Attach a measurement method: score threshold, pass/fail rubric, or completion requirement.
- Make it role-based. What’s “success” for a student in Beginner vs Advanced should differ.
Example (sales team onboarding)
- Goal: New sales reps can confidently run a discovery call and log the results.
- Success criteria:
- Completes a 10-question product knowledge check with 80%+.
- Writes a discovery-call summary using the template with no missing fields.
- Runs a 3-minute role-play with correct objection-handling structure (rubric score ≥ 3/4 on 3 categories).
How to measure effectiveness
- Time-to-first-success: how many days until students complete the first graded activity.
- Assessment pass rate: percentage meeting success criteria by day 7.
- Support volume: number of “where do I find…” and “how do I…” tickets in week one.
One more thing: goals aren’t set in stone. If you see students failing the same criterion, that’s not a student problem—it’s a design problem. Update the criterion or the lesson that teaches it.
2. Develop a Structured Learning Path
A structured path is what keeps onboarding from turning into a random playlist. I like to think of it as prerequisite → practice → proof.
What to produce (artifact)
- 9-step onboarding schedule (day-by-day or week-by-week)
- Lesson map showing prerequisites between modules
- Assessment checkpoints (formative + one summative proof task)
How to produce it (process)
- Start with orientation: how the course works, where resources live, what “good work” looks like.
- Move into fundamentals: core concepts and key vocabulary.
- Then role tasks: the first “real” activity should be doable with the knowledge you’ve just taught.
- Keep each lesson short: aim for 10–20 minutes for core content, then add a 10–30 minute activity.
- Use varied formats (video + checklist + practice) so students don’t get stuck in passive mode.
Example onboarding path (4 lessons + checkpoints)
- Lesson 1 (Day 1): “How this course works” + navigation quiz
- Lesson 2 (Day 2): “Core concepts” + fill-in-the-blank worksheet
- Lesson 3 (Day 4): “Tool practice” + guided simulation
- Lesson 4 (Day 7): “Performance task” + rubric scoring
How to measure effectiveness
- Completion rate by lesson: if Lesson 2 is where people drop, you likely overstuffed it.
- Drop-off timing: are students leaving after video-only sections?
- Reattempt rate: if quizzes are too hard or feedback is unclear, students won’t improve.
Quick reality check: I’ve seen “microlearning modules” fail when they’re too tiny to practice anything. The goal isn’t size—it’s practice that leads to proof.
3. Simplify Enrollment and Administrative Steps
If students can’t access the platform, nothing else matters. In my experience, admin friction is the #1 reason onboarding feels “broken,” even when the lessons are great.
What to produce (artifact)
- Onboarding “Start Here” page (single place to begin)
- Account + access checklist (internal)
- Student welcome email sequence (Day 0, Day 1, Day 3)
How to produce it (process)
- Use a single sign-on or unified login if you can (less password chaos).
- Automate: account creation, role assignment, and LMS course enrollment.
- Trigger it from your form or CRM.
- Send the welcome email only after access is confirmed.
- Make instructions scannable: “Step 1 / Step 2 / Step 3” with screenshots.
- Include a “first 10 minutes” path: students should know exactly what to do immediately.
Example: welcome email (Day 0)
- Subject: “Start here: your first lesson takes 10 minutes”
- Include:
- Direct link to the LMS course
- 1 screenshot: where to click
- Checklist: “Watch → Complete → Submit”
- Support link: “If you can’t log in, reply to this email”
How to measure effectiveness
- Login success rate: percent who can access within the first day.
- Admin tickets per 10 students: track “can’t access” and “where is…” requests.
- Time-to-first-lesson submission: faster is better, but only if quality stays high.
And yes—this matters because if students stall before learning even starts, you’ll see churn-like behavior. The fix is usually operational, not instructional.
4. Personalize the Onboarding Experience
Personalization doesn’t have to mean fancy AI. It can be as simple as placement and choice.
What I’ve noticed works best: students feel “seen” when the onboarding matches their starting point. If you treat everyone like absolute beginners, advanced students get bored. If you treat everyone like experts, beginners get stressed.
What to produce (artifact)
- Placement check (short quiz or task)
- Two or three onboarding tracks (Beginner / Familiar / Advanced)
- Optional enrichment modules (for those who finish early)
How to produce it (process)
- Build a placement check: 8–12 questions max, or one mini performance task.
- Assign a track:
- Beginner: needs fundamentals + extra examples
- Familiar: skips orientation basics, focuses on practice
- Advanced: goes straight to role tasks with deeper challenges
- Let students choose a format: “video walkthrough” vs “reading checklist” for the same concept.
- Add a human touch: a welcome note from a manager, tutor, or mentor with one personal question.
How to measure effectiveness
- Track accuracy: if students in “Advanced” still struggle on Lesson 3, your placement is off.
- Engagement by format: which option leads to higher completion?
- Support requests by track: fewer is better, but don’t ignore qualitative feedback.
If you do use AI, I recommend using it for support and routing, not replacing learning design. For example: an AI assistant can answer “where do I find X” using your course docs, and it can suggest the next lesson based on quiz performance. That’s a practical use-case.
5. Include Interactive and Practical Activities
Here’s the thing: onboarding shouldn’t feel like homework. It should feel like the first time students can do something with what they just learned.
What to produce (artifact)
- 1 simulation (guided practice)
- 1 performance task (graded, rubric-based)
- 1 feedback method (auto-feedback + human/peer feedback)
How to produce it (process)
- Pick activities that mirror real tasks students will do later.
- Reduce risk: start with a “safe” version (scenario with hints), then increase difficulty.
- Write clear instructions and “what good looks like.”
- Use a rubric with 3–5 criteria so feedback is consistent.
Example: customer support onboarding activity
- Simulation: “Handle a tricky refund request” (students choose response + follow-up question)
- Success criteria: correct policy reference, empathetic tone, and next-step clarity
- Assessment: rubric score ≥ 3/4 on each criterion
Example quiz question set (you can copy)
- Multiple choice: “Where should you log a refund request once approved?”
- Scenario: “A customer says X—what’s the best first response?” (choose one)
- Short answer: “Write a 2-sentence confirmation message that includes the next step.”
How to measure effectiveness
- Performance task pass rate by day 7
- Rubric trends: which criterion is failing most often?
- Time-on-task: if students take too long, instructions may be unclear or missing prerequisite content
I also like adding a tiny “win” badge—something like “You completed your first scenario”. It sounds small, but it helps students feel momentum.
6. Use Technology and Resources Effectively
Technology should reduce confusion, not create it. The goal is simple: students should always know where to go next and how to get unstuck.
What to produce (artifact)
- LMS structure (folders/modules mapped to onboarding schedule)
- Knowledge base articles (login, navigation, assignment submission, troubleshooting)
- Support workflow (chat/FAQ + escalation to a human)
How to produce it (process)
- Centralize everything in the LMS: one course shell, one “Start Here,” one place for resources.
- Automate repetitive support:
- Chatbot/AI assistant answers common questions using your knowledge base
- Escalate when confidence is low or the question is about a personal case
- Use predictive analytics carefully: look for patterns like:
- Students who miss Lesson 1 by day 2
- Students who fail the placement check twice
- Students with repeated “access” errors
- Trigger interventions: send a short message, offer an alternative track, and schedule a quick check-in.
How to measure effectiveness
- First-contact resolution rate: percent of questions handled without human support
- Escalation rate: if it’s too high, your knowledge base needs better coverage
- Learning metrics: completion and performance task scores after support changes
On the chatbot stats: you’ll see lots of numbers online, but they vary by dataset and setup. If you want a credible benchmark, look for studies from organizations like MIT Sloan Management Review or reports from major edtech vendors that describe their methodology. Otherwise, treat any “X% answered” claim as context-dependent.
7. Build a Sense of Community
Students stick around when they feel supported. Not “motivated by vibes”—supported by actual people who respond.
What to produce (artifact)
- Buddy system (mentor or peer pairing)
- Community prompts (discussion questions with structure)
- Recognition moments (celebrate early wins)
How to produce it (process)
- Pair students intentionally: match by track, timezone, or interests—not randomly.
- Give buddies a script: “Ask them about their goal and what part feels hardest.”
- Use structured discussions: prompt + example answer + word limit (prevents rambling).
- Do a first-week “wins” post: “Share your completed scenario + one thing you learned.”
How to measure effectiveness
- Participation rate: number of students who post in week one
- Peer support impact: count “buddy helped me” notes in feedback
- Sentiment: quick survey question: “I feel like I know who to ask for help.”
In remote setups, community isn’t optional. Without it, onboarding becomes a solo grind, and students interpret confusion as “I’m not cut out for this.”
8. Collect Feedback for Continuous Improvement
Feedback is where onboarding becomes better than it was last month. But you can’t just collect it—you need timing and follow-through.
What to produce (artifact)
- Feedback survey (3 short versions)
- Issue log (what broke, where, and what you changed)
- Change tracker (before/after notes for your next iteration)
How to produce it (process)
- Day 3 check-in (5 questions):
- Can you find your assignments?
- Which lesson felt easiest?
- Which part felt confusing?
- How confident are you about the next step? (1–5)
- Any access issues?
- Week 2 check-in: focus on pacing and clarity.
- Are deadlines realistic?
- Did instructions match what you expected?
- Was feedback helpful?
- End of onboarding: measure outcomes.
- Did you meet the success criteria?
- What would you remove?
- What would you add?
How to measure effectiveness
- Change impact: did completion or performance scores improve after your update?
- Issue recurrence: are the same problems showing up month after month?
- Qualitative themes: categorize comments (navigation, difficulty, unclear instructions, pacing).
If you want a concrete reference for why feedback and iteration matter, the learning science and learning analytics discussions from major platforms often emphasize measuring learner behavior and iterating content. Still, always validate with your own data—your audience is different.
9. Provide Ongoing Support After Initial Onboarding
Onboarding is the start, not the finish. Students often hit a “second wall” after week one—the part where they try real assignments and realize they need guidance for nuance.
What to produce (artifact)
- Support cadence (week 2, week 4, and month 2)
- Refresher paths (short modules for common gaps)
- Escalation rules (when to move from self-serve to human support)
How to produce it (process)
- Week 2 check-in: “Are you stuck on anything specific?” plus a short progress review.
- Week 4 office hours: review performance task feedback and show how to improve.
- Month 2 reinforcement: send a “you’re ready for the next step” path based on scores and participation.
- Encourage help-seeking: normalize questions with a template like: “I tried X, I expected Y, but I got Z.”
How to measure effectiveness
- Drop-off after onboarding: does student activity stabilize?
- Reattempt improvement: do students improve after feedback and office hours?
- Retention proxy: completion of first major graded assignment after onboarding.
And yes, mental health resources matter too. If your learners are stressed, they won’t absorb content. Even simple things like “how to request accommodations” and “where to find support” should be part of your onboarding documentation.
FAQs
Start with one outcome sentence (what students can do by the end). Then write success criteria in observable terms, and attach a measurement method—like a quiz score threshold, a rubric score, or a completed checklist. If you can’t test it, it’s probably not a success criterion yet.
Use a placement check (short quiz or mini task) and route students into beginner/familiar tracks. Add optional modules for enrichment, and offer the same concept in different formats (video walkthrough vs checklist vs examples). Personalization should reduce confusion, not add complexity.
Include at least one guided practice activity (simulation, role-play, or worksheet) and one performance task you can score with a rubric. Shadowing can work too, but only if students later complete a task that proves they understood what they watched.
Use an LMS to centralize resources and track progress. Add a knowledge base for “how to” questions, then use chat support (including AI assistants) to answer common issues using your own documentation. The best tech setups also trigger outreach when learners miss key checkpoints.
Worked Example: A Full Onboarding Lesson (Copy/Paste Template)
To make this real, here’s a full onboarding lesson I’d build for a new customer support student joining a course. You can adapt the scenarios, but keep the structure.
Lesson title
Onboarding Lesson 3: Handle Your First Customer Scenario (Simulation + Rubric)
Duration
45 minutes total: 10 min prep, 20 min simulation, 10 min feedback + revision, 5 min submission.
Learning objectives (taxonomy)
- Remember: Identify the correct escalation path for policy exceptions.
- Apply: Choose an empathetic first response and reference the right policy step.
- Analyze: Spot missing info that should be collected before offering a solution.
- Evaluate: Use a rubric to self-check tone, clarity, and next-step accuracy.
Materials / assets
- LMS page with lesson instructions + links to the policy guide
- Short video (8 minutes): “How we handle refunds and escalations”
- Simulation tool or interactive branching scenario (or a simple form-based scenario)
- Rubric (4 criteria, 1–4 scale)
- Example “good response” (2 paragraphs) for reference
Step-by-step lesson flow
- 0–10 min: Prep
- Students watch the video
- They complete a 3-question “policy quick check” (auto-graded)
- 10–30 min: Simulation
- Scenario: “Customer requests a refund after missing the return window.”
- Students choose:
- First response message
- Which missing details to request
- Whether to escalate and why
- 30–40 min: Feedback + revision
- System shows rubric-based feedback and one “missing step” note
- Students revise their response once
- 40–45 min: Submission
- Submit final response + self-check using the rubric
Rubric (example)
- Empathy & tone (1–4)
- Policy accuracy (1–4)
- Clarity of next steps (1–4)
- Escalation reasoning (1–4)
Assessment methods
- Auto-graded policy quick check (pass threshold: 2/3)
- Rubric score for simulation response (pass threshold: average ≥ 3/4)
- Revision attempt required (completion metric)
Feedback loop (what happens if they miss)
- If policy quick check fails:
- Route to a 6-minute “policy refresher” micro-lesson
- Retry once
- If rubric average < 3:
- Send a targeted feedback message:
- “Your response is empathetic, but it doesn’t include the correct next step.”
- Offer an office-hours slot or buddy review checklist
- Send a targeted feedback message:
How to measure effectiveness (specific)
- Pass rate: % meeting rubric threshold by Day 7
- Revision improvement: average rubric score change from first attempt to revised attempt
- Support impact: compare “refund policy” questions in week one vs after lesson rollout
Mini Case Studies (What changed, what failed, what worked)
Case study 1: “Too much content, not enough proof”
Before: Onboarding was mostly video lessons + a single quiz. Students completed modules, but performance tasks were weak. Support requests were high in week two.
Constraints: We couldn’t add a full extra week. We had to keep onboarding within 7 days.
What we changed: We replaced two passive videos with:
- one simulation (branching scenario)
- one rubric-based performance task
- one “policy quick check” before the simulation
What failed: The first version of the rubric was too vague (“be clear”). Students didn’t know how to improve.
Fix: We rewrote rubric criteria into observable behaviors and added a “good example” response.
Result: Pass rate on the performance task rose significantly within the first onboarding cycle, and week-two support tickets dropped because students had already practiced the exact scenario.
Case study 2: “Admin friction killed momentum”
Before: Students received access emails at different times. Some couldn’t log in on day one and didn’t know what to do next.
Constraints: The platform team couldn’t change core authentication immediately.
What we changed:
- We created a “Start Here” page with a single checklist.
- We added a troubleshooting section: “If you can’t log in, do this.”
- We delayed the welcome email until access was confirmed (automation).
Result: Students reached the first onboarding activity faster, and early drop-off decreased because confusion was handled immediately.
Downloadable Templates / Checklists (Use as starting points)
1) Onboarding Goals & Success Criteria Checklist
- Goal statement written as a single outcome
- 5–8 success criteria with measurable thresholds
- Assessment method chosen for each criterion
- Pass thresholds agreed with stakeholders
2) 9-Step Onboarding Schedule Template
- Day/Week for each step
- Lesson format (video, reading, simulation, performance task)
- Estimated duration
- Checkpoint + measurement metric
- Fallback path if they fail or get stuck
3) Performance Task Rubric Template
- 3–5 criteria
- 1–4 scale definitions
- One “good example” included
- Feedback notes aligned to each criterion
If you want, tell me what kind of course you’re onboarding for (industry + learner level + length of onboarding), and I’ll help you fill these templates with examples that match your context.