
Mindful Photography Workshops: How to Improve Creativity and Focus
If you’ve ever caught yourself taking photos on autopilot—click, click, swipe—then looked back and thought, “Wait… what was I even trying to capture?”—yeah, you’re not alone. That’s exactly why I like mindful photography workshops. They help you slow down enough to actually notice what you’re seeing, and somehow that makes your images feel more personal (and way more fun) almost immediately.
I’ve run and attended sessions that are built around attention, not gear. The first time I tried one of these formats, I expected “relaxation” and maybe a few vague tips. Instead, I left with a simple routine I could repeat: a short grounding step, a tight shooting constraint, and a journal prompt that made me look at my own photos differently.
In this article, I’ll walk you through what to do in a mindful photography workshop, what you can expect to change in your shooting (and your mood), and how you can practice it on your own even if you never join a class.
Key Takeaways
- Mindful photography is basically “slow attention” for cameras: you pause, observe, and shoot with intention so your photos feel more genuine and less rushed.
- Most people notice an immediate shift—less impatience, more patience with themselves, and a stronger connection to the subject right after the first session.
- Workshops usually use a repeatable structure: breath or grounding (1–3 minutes), slow looking (5–10 minutes), shot limits (like 10–12 frames), and journaling to lock in what you noticed.
- Beyond creativity, mindfulness can help with stress regulation and focus. You’re training attention on purpose, which carries over into everyday life.
- You don’t need special equipment. A phone works, and even basic camera settings can stay the same while your attention changes.
- Journaling prompts matter. They turn “I took a photo” into “this photo means something,” which is where personal style starts to emerge.
- Common early problems (distraction, awkwardness, bland images) have practical fixes—like shorter sessions, tighter prompts, and specific ways to choose subjects.
- Community feedback helps too. Hearing why someone else photographed the same scene differently can instantly widen your creative range.
- You can find workshops locally or online by filtering for “mindful / slow looking / journaling / shot limits,” not just “composition tips.”
Practice Mindful Photography to Enhance Your Creativity
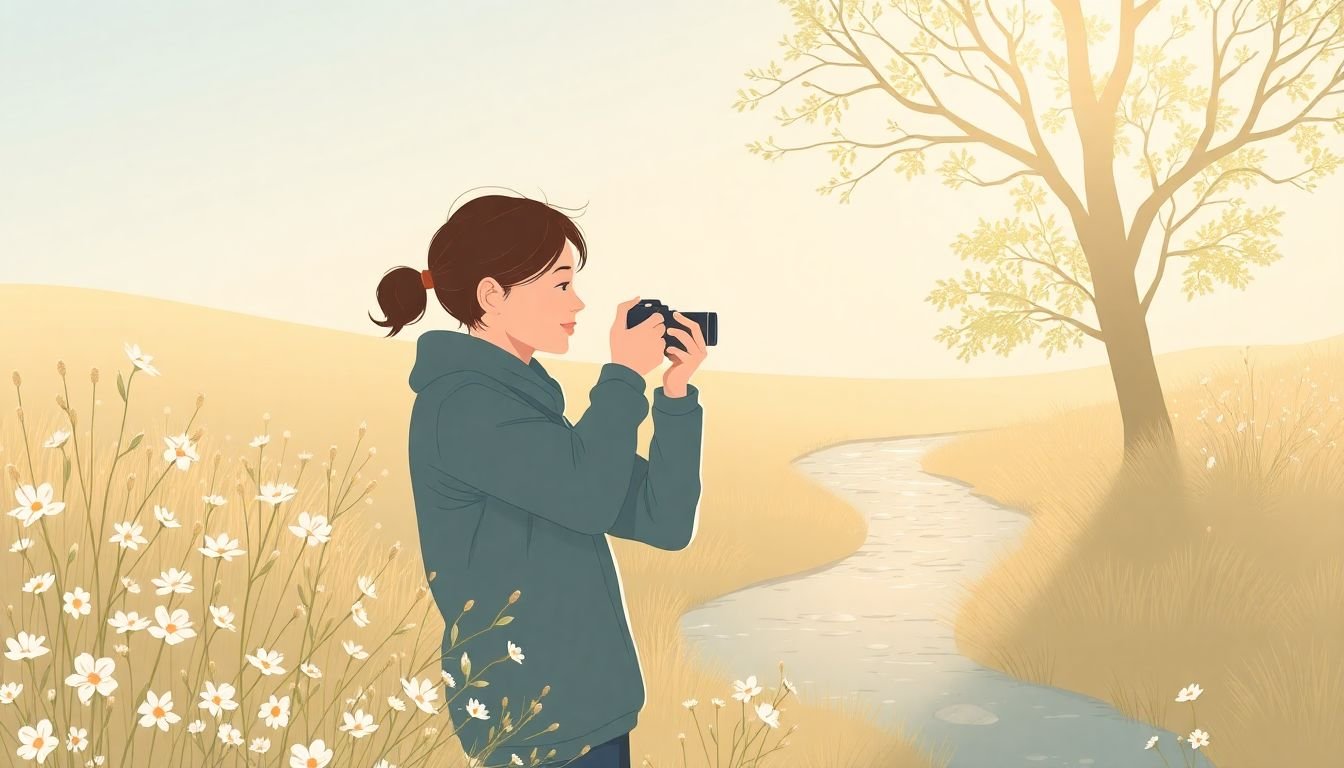
Mindful photography is what happens when you stop treating your camera like a slot machine. You’re not just “taking pictures.” You’re training yourself to notice—light, texture, distance, mood—before you press the shutter.
Here’s the simple workflow I tell people to try first (and yes, it works with both phones and cameras):
- Ground for 60–90 seconds: stand still, breathe slowly, and feel your feet on the ground. No phone scrolling. Just you and the scene.
- Slow looking for 5 minutes: look without shooting. Pick one “anchor detail” (a shadow edge, a repeating pattern, the way clouds reflect on glass).
- Choose one theme: decide what you’re photographing today—something like “quiet,” “contrast,” “patterns,” or “movement.”
- Shot limit: take 10–12 photos maximum. When you hit the limit, stop. This forces you to commit.
- Quick note (30 seconds): write one sentence about what you felt and one about what you noticed visually.
If you want a concrete example, try this next time you’re outside: pick a single tree or building and spend your slow-looking time finding three different kinds of light on it (bright edge, shaded side, and a highlight where it catches the sun). Then shoot your 10 frames using those three light moments as your “chapters.” Suddenly your set looks intentional—even if your settings are basic.
And just to be clear: the goal isn’t technical perfection. The goal is to capture a real moment of attention. The best photos I’ve made with this method weren’t the sharpest ones. They were the ones that felt like they belonged to me.
Understand the Immediate Benefits of Mindful Photography Workshops
When you join a mindful photography workshop, the first benefit is usually psychological—like someone turned down the speed of your day.
In my experience, people walk in stressed or self-critical and leave with a calmer rhythm. They’re less likely to feel rushed. They also start noticing details they normally blow past: small color shifts, the “messy” beauty of street life, the way wind moves leaves in a pattern.
What surprised me the first time was how quickly connection shows up. You’re not just looking at a subject—you’re engaging with it. Group discussions help a lot too. When someone explains why they photographed the same place you did, you realize there are multiple “right” interpretations. That alone can unlock creativity.
Also, workshops often include reflection, which makes the practice stick. You don’t just do an exercise; you verbalize it and write it down. That’s when the change becomes real.
One last thing: if you’ve been trying to “get better” at photography by obsessing over settings, mindful workshops give you a different path. You still learn technique when it’s useful—but you stop using it as a shield.
Learn Core Practices in Mindful Photography Workshops
Most mindful photography workshops follow a structure that’s surprisingly consistent. Different instructors brand it differently, but the ingredients are usually the same: attention training, guided observation, constraints, and reflection.
Here’s a practical look at what a typical 60-minute session can include (use this as a checklist when you evaluate a workshop):
- 0–10 minutes: Grounding + intention
- Breathing or body scan (1–2 minutes)
- Pick today’s intention: “I’m photographing calm,” “I’m photographing textures,” etc.
- 10–25 minutes: Slow looking
- Instructor gives a visual prompt
- Participants observe quietly for 5–10 minutes
- Optional: one “practice frame” before the real shooting round
- 25–45 minutes: Shot-limited shooting
- Take 10–12 photos total
- Rule: no deleting during the session (so you don’t break the flow)
- Optional camera suggestion: use aperture priority or a consistent mode so you’re not thinking about every setting
- 45–60 minutes: Journaling + short sharing
- Write 3–5 lines
- Share one photo and one sentence about why it caught your attention
Now, about journaling—this is where the “mindful” part becomes tangible. If the workshop doesn’t include reflection, you’ll still improve, but it usually takes longer to develop a personal style.
Here are 8 journaling prompts I’ve seen work well in real sessions:
- What detail did I notice first—and what did I ignore before?
- What emotion did I feel while I was looking (not while I was editing)?
- If this photo had a soundtrack, what would it be?
- Where did my attention go when I stopped rushing?
- What did I photograph that surprised me?
- What’s one “rule” I broke on purpose today?
- What would I tell a friend to help them see this scene?
- Which of my 10–12 frames feels most honest, and why?
If you’re using a phone, keep it simple: don’t overthink filters. Try to capture the mood first, then adjust later if you want. The mindful practice is about seeing—not about making everything look “Instagram-perfect.”
How Mindful Photography Can Improve Attention and Emotional Resilience
You’ll often hear big claims about neuroscience and brain changes. I’m not going to throw around unsupported “gray matter” headlines here.
What I can say confidently is this: mindfulness practices are well-studied for improving attention control and helping people manage stress. When you apply that to photography, you’re repeatedly doing an attention task—notice, return, refine. That kind of repetition can make it easier to stay present, even outside the camera.
In a workshop setting, the shift can look like:
- Less impulsive shooting: you pause before clicking because you’re aware of your urge to “just get something.”
- Better emotional regulation: when a shot doesn’t work, you’re less likely to spiral into frustration.
- More tolerance for ambiguity: you learn to stay with a scene long enough to find meaning, even if it doesn’t “pop” instantly.
I’ve watched participants go from “I don’t like any of them” to choosing one frame and explaining it clearly—without needing technical jargon. That’s emotional resilience in action: you’re building a kinder relationship with your own process.
Over time, those habits carry into daily life: you notice when you’re rushing, you can slow down sooner, and you handle stress with a little more space.
Incorporating Mindful Photography Into Your Daily Routine
You don’t need a workshop to start. You just need a repeatable micro-practice.
Try this for one week:
- Day 1–3 (5 minutes): take one “slow walk” photo. Before you shoot, stand still for 30 seconds and breathe. Then take one photo and write one sentence about what you noticed.
- Day 4–5 (10 minutes): pick a theme like “patterns” or “shadows.” Take 8 photos max. Stop when you hit the limit.
- Day 6–7 (15 minutes): do slow looking first (5 minutes), then shoot for 10 minutes with a limit of 10–12 frames.
Want a simple prompt you can steal? Here are three easy ones:
- “Photograph what feels quiet.” Look for soft light, empty spaces, stillness.
- “Photograph contrast.” Light vs. shadow, rough vs. smooth, old vs. new.
- “Photograph repetition.” Windows, tiles, fences, rows of leaves—anything repeating.
Once you do this a few times, you’ll start noticing something funny: you’re not just taking better photos—you’re also feeling more present while you’re doing it.
Curated Resources to Help You Practice Mindful Photography
If you want to deepen your practice, I’d rather point you to resources that actually match the mindful approach—books and courses that encourage observation, intention, and storytelling.
Here are a few I recommend (and what you can do with them):
- “The Soul of the Camera” by David duChemin
- Why it fits mindful photography: it pushes you to see photography as a relationship with the world, not just a technical task.
- Try this exercise: pick one chapter theme (like meaning, attention, or vision) and apply it to a single 10-photo set during a walk.
- “Zen Camera” by David Ulrich
- Why it fits: it leans into slower, more aware shooting—very close to mindful practice.
- Try this exercise: choose one “zen” idea and make it your intention for a session. Then write a short note about how it changed what you photographed.
For online materials, I’d look for workshops that include slow looking, journaling, and constraints (like shot limits). If a course only teaches camera settings, it might help your exposure—but it won’t necessarily change how you see.
One more tip: when you find a video or class, pause it and try the prompt immediately. Don’t just watch. Do the exercise while it’s fresh. That’s the whole point.
Getting Started: What’s Typically Included in a Mindful Photography Workshop
If you’re shopping for a workshop, here’s what you should expect to see. If these elements are missing, you might not get the “mindful” benefits you’re hoping for.
- Guided attention drills: breath focus, body grounding, or a short “arrive here” exercise.
- Slow looking: a timed look at a scene before anyone shoots.
- Shot limits: a clear number like 10, 12, or 15 frames so you don’t default to spray-and-pray.
- Journaling prompts: reflection that turns seeing into meaning.
- Story-based sharing: participants explain what they noticed and why, not just what settings they used.
- Optional critique: feedback that stays kind and focused on intention (not just sharpness).
In case you want mini “case studies,” here are three realistic scenarios I’ve seen in workshops:
- Case 1: “My photos look bland.” Fix: the instructor gives a prompt like “photograph only edges and textures.” With shot limits + a clear subject rule, participants usually return with images that have stronger visual energy.
- Case 2: “I feel awkward slowing down.” Fix: start with 2-minute slow looking instead of 10. Once your brain adapts, you can extend the time.
- Case 3: “I can’t find subjects.” Fix: choose constraints like “only doors,” “only reflections,” or “only repeating shapes.” You stop waiting for inspiration and start building it.
That’s the thing: mindful photography isn’t about waiting to “feel creative.” It’s about giving your attention a structure so creativity shows up.
Common Challenges and How to Overcome Them When Practicing Mindful Photography
Let’s be real—mindful photography can feel weird at first. You might feel impatient. Or you might worry you’re “doing it wrong.” Good news: those are normal problems, and they’re fixable.
- “I keep getting distracted.”
Don’t fight it. Gently return to one anchor: your breath or your anchor detail in the scene. Try a shorter loop: 60 seconds of attention, then one shot, then 60 seconds again.
- “I feel awkward slowing down.”
Start tiny. Do slow looking for 2 minutes. Then shoot your 5-frame set. Once you’ve done it a few times, it stops feeling like a performance and starts feeling normal.
- “I can’t find anything worth photographing.”
Use subject prompts. Pick one category (doors, shadows, patterns, reflections, hands, leaves). When you narrow the search, your brain stops freezing.
- “My photos don’t look different from usual.”
Check whether you’re actually following the slow-looking step. If you skip it, you’ll default to autopilot. Also try a theme + shot limit combo. Those two constraints usually create noticeable change fast.
- “I get frustrated and want to delete everything.”
Try “no deleting during the session.” Save the judgment for after. Mindfulness is about process, not instant results.
- “I worry I’m not creative enough.”
Creativity isn’t a personality trait. It’s a practice. Give yourself a week of micro-sessions and track what you noticed, not just what you shot.
Progress usually looks boring at first—more noticing, fewer random clicks, and a calmer reaction when a moment doesn’t work. Then one day you’ll realize you’re seeing differently.
How to Find Local or Online Mindful Photography Workshops
To find a workshop that actually matches mindful photography, I recommend searching for keywords like slow looking, journaling, shot limits, and intention—not just “photography basics.”
- Local options: community centers, art schools, photography clubs, and sometimes even library events. If you ask, many instructors will tell you whether they include reflective practice or just a class lecture.
- Online options: look for live guided sessions where participants shoot together (even if you’re in your own neighborhood). That shared timing helps.
- What to check before booking: instructor background, session length (30 minutes vs. half-day), whether there’s outdoor practice, and how feedback works.
Also, don’t ignore platforms that curate destinations and formats. For example, you might see options listed on Create a Course (including trips like Umbria, Italy). If a workshop is multi-day, you’ll usually get more time for reflection—which is where the “style” part often develops.
Finally, read reviews like a detective. Look for phrases such as “guided prompts,” “slow looking,” “journaling,” or “I felt more confident.” Those are the signals that it’s not just another photography class.
FAQs
It helps you stay present while shooting, notice more details, and turn what you see into something more personal. Many people also feel less stressed during the process because they’re not constantly rushing or judging every frame.
You’ll usually get guided attention exercises, a structured slow-looking prompt, time to shoot with constraints (like shot limits), and reflection through journaling or group sharing. The focus is on intention and seeing, not just camera settings.
They’re great for beginners who want a confidence boost, and for experienced photographers who feel stuck in autopilot. If you’re trying to reduce stress or build a more intentional creative practice, they fit well.
Start small: slow your shooting down, pick one theme, take only a limited number of photos, and write a quick note about what you noticed and how it made you feel. Do that consistently for a week and you’ll feel the difference.