
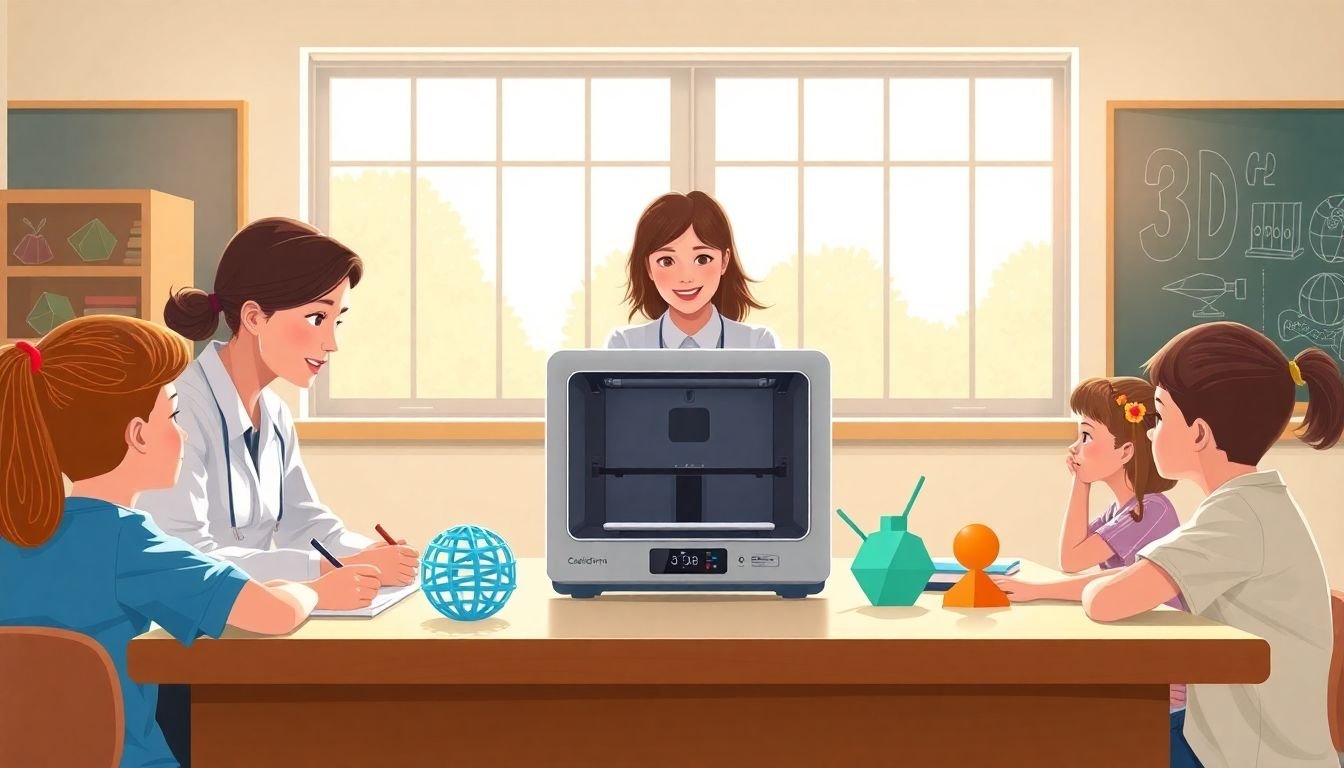
3D Printing Fundamentals for Educators: How to Get Started in 7 Easy Steps
You’re interested in 3D printing for your classroom, but it feels a little overwhelming at first. I get it. When you’re staring at a printer, a slicer, and a pile of settings you don’t fully trust yet, it’s hard not to second-guess yourself.
Here’s what helped me: I stopped thinking of 3D printing as “a technology project” and started treating it like a repeatable classroom routine. Once you know what the printer is doing (and what can go wrong), the whole thing gets way easier.
In this post, I’m going to walk you through the basics and then give you practical, classroom-ready ideas you can actually run—whether you have one printer or you’re sharing with another department.
Key Takeaways
- Learn the workflow first: digital model → slicer → printer settings → print → remove/finish. I’d recommend starting with PLA and printing “confidence builders” like calibration cubes, name tags, and simple keychains. You’ll also want a tiny vocabulary list (slicer, infill, supports, bed leveling) so troubleshooting doesn’t feel like guessing.
- Pick the right printer type for your classroom: FDM (melted plastic filament) is the most common in K–12 because it’s relatively affordable and forgiving. SLA/DLP (resin + light) gives amazing detail but adds safety, odor, and cleanup steps. SLS is usually not classroom-friendly due to cost and complexity.
- Choose tools you can maintain: look for a printer with easy parts availability, clear setup docs, and strong community support. For software, start with beginner-friendly options like Tinkercad (design) and Cura (slicing). Trust me—when you’re teaching, “easy to recover from mistakes” matters more than fancy features.
- Use 3D printing to cut material costs (and teach planning): instead of buying class sets of replacement parts or one-off teaching aids, print custom models locally. I’ll show you an example cost comparison below so you can see where the savings actually come from (materials, waste, and time).
- Build STEM projects that produce real artifacts: don’t just “print stuff.” Have students design, iterate, and test. Start with one-week prototypes (gears, bridges, simple mechanisms) and grade with a rubric that rewards iteration—not just pretty prints.
- Use 3D printing for art and design outcomes: students can design jewelry, cosplay accessories, relief sculptures, and textured plaques. The key is to give them design constraints (size, thickness, finish) so the prints are reliable.
- Bring coding into the physical world: use parametric modeling (like OpenSCAD) or simple scripts to generate shapes. Students can “run code → generate a model → print → measure results.” That loop is where the learning sticks.
Understand 3D Printing Basics for the Classroom
Getting started with 3D printing in your classroom isn’t about buying the fanciest machine. It’s about understanding the loop and building a routine you can run with students.
Here’s the simple version: 3D printing builds objects layer by layer from a digital design, usually using plastics like PLA or ABS. (If you’re new, PLA is your friend. It’s more forgiving and smells less intense than ABS.)
In my experience, the fastest way to reduce stress is to teach the workflow before you teach the students to design. Think: “model → slice → print → evaluate.”
Slicer basics (the part that trips people up)
A slicer takes a 3D model (often an STL or 3MF file) and converts it into printer instructions. Those instructions include things like:
- Layer height (how thin each slice is)
- Wall/perimeter count (how many “shell” lines surround the model)
- Infill (what fills the inside)
- Supports (extra material under overhangs)
- Temperatures (nozzle and bed)
- Print speed
What I’d print first (so you actually get wins)
Before you print student designs, you want a few “test prints” that tell you the printer is behaving. I typically run:
- Bed adhesion check: a small flat rectangle or calibration plate test
- Calibration cube: 20 mm cube (or a simpler 10 mm version)
- Overhang test: something with angles (helps you learn supports)
- Functional starter: a keychain or phone stand (students love these and they’re low-risk)
Why these? Because they surface the most common classroom problems: poor adhesion, weak walls, stringing, and overhang failure.
Troubleshooting checklist you can reuse
When a print fails, don’t panic. I use a quick “check order” so I don’t waste half a day:
- First layer looks wrong? Re-level the bed and check bed temperature. For PLA on many common beds, starting around 200–210°C nozzle and 50–60°C bed is a reasonable starting point (then adjust based on your filament brand and printer).
- Layers aren’t sticking to each other? Lower speed slightly (e.g., from 60 mm/s to 40–50 mm/s), and confirm nozzle temp isn’t too low.
- Print is warping? Try a brim, slow the first layer, and make sure the enclosure/room draft isn’t blasting the printer.
- Stringing or blobs? Reduce nozzle temperature a bit and check retraction settings in your slicer.
- Filament seems brittle or inconsistent? Dry your filament. Wet PLA can look “fine” for a few minutes and then suddenly go stringy or fail.
That’s the thing—most classroom failures aren’t mysterious. They’re predictable once you know where to look.
A simple onboarding timeline (works for most schools)
If you’re teaching on a normal semester schedule, this is a realistic pace:
- Week 1: teacher setup + 3–4 test prints + create a “class starter pack” (student-ready models and a single slicer profile you trust)
- Week 2: student design basics + small prints (keychains, name tags, simple reliefs)
- Week 3–4: one bigger STEM/art prototype project with iteration and a short reflection
The education market is expected to grow significantly in the coming years, and schools are clearly investing in this space [1]. But the real reason to start now is simpler: students learn faster when they can hold what they’re learning.
If you want lesson prep support, you can also reference createaicourse.com/what-is-lesson-preparation/ for planning ideas tailored to educators.
Learn About Different Types of 3D Printing Technology
Not all 3D printers are created equal. Knowing the differences helps you avoid buying something that’s “cool” but a pain to run in a classroom.
FDM (Fused Deposition Modeling)
This is the most common in K–12. An FDM printer melts plastic filament and lays it down in lines, building the object layer by layer.
- Best for: durable classroom models, prototypes, replacement parts
- Pros: affordable, easy to maintain, usually less safety overhead than resin
- Typical materials: PLA, PETG, sometimes ABS
- Tradeoff: surface finish is less smooth than resin
SLA/DLP (resin printing)
These use resin and light to cure the model into shape. The detail can be incredible.
- Best for: jewelry, miniatures, highly detailed figures
- Pros: very fine detail
- Tradeoff: resin handling, washing/curing steps, and safety procedures (plus additional equipment)
SLS (powder laser sintering)
SLS uses lasers to fuse powdered material. In education, it’s usually not a “buy it for the classroom” option because of cost and operational complexity.
How I’d choose based on your classroom needs
Ask yourself: what do students need to do?
- If you want fast and repeatable prints for multiple classes, go FDM.
- If your curriculum is focused on high-detail mini designs and you have the procedures/equipment for resin, consider SLA/DLP.
- If you’re unsure, start with FDM. You can always add resin later after you’ve built your workflow.
FDM is also dominant in the education space because it’s affordable and reliable enough for school schedules. The educational sector is expected to grow at a strong rate [9], which is a good sign—more resources and community support are showing up all the time.
Select the Right 3D Printer and Software for Educators
Choosing a printer isn’t just about the sticker price. It’s about whether you can keep it running when you’re busy teaching.
What to prioritize (my classroom “must haves”)
- Easy setup: clear instructions, stable calibration, minimal “tweak for hours”
- Good support: warranty + parts availability
- Community tutorials: if you can’t find fixes quickly, you’ll lose instructional time
- Print reliability: consistent results across multiple days
- Maintenance burden: can you swap a nozzle and do basic cleaning without a tech team?
Printer options (and the tradeoffs you should know)
Many schools start with popular FDM options like Creality Ender or FlashForge because they’re often available at different price tiers and have lots of tutorials online. What I noticed is that the “best” choice depends on how much time you want to spend tuning.
- Budget-friendly: you might spend more time leveling and tweaking.
- Smoother classroom experience: higher-end models often have better auto-leveling or more stable components, which means fewer failed prints.
Software: start simple, then add depth
If you’re new, I’d keep it straightforward:
- Design: Tinkercad (great for beginners and classroom-friendly)
- Slicing: Cura (widely used, lots of profiles)
Later, if you want more control, students (or you) can move toward Fusion 360 or other CAD tools.
Exact “starting point” slicer settings (a teacher-friendly baseline)
Every printer and filament behaves slightly differently, but here’s a baseline I’ve used to get decent results quickly for PLA on many common FDM setups:
- Layer height: 0.2 mm
- Line width: default (often ~0.4 mm nozzle)
- Walls/perimeters: 3
- Infill: 15–20% (grid or gyroid if available)
- Top/bottom layers: 4–5
- Supports: “touching build plate only” (for most beginners)
- Nozzle temp (PLA): 200–210°C
- Bed temp (PLA): 50–60°C
- Print speed: 40–60 mm/s (slower often = fewer failures)
Don’t treat these as “forever settings.” Treat them as training wheels. Once you see your first layer and wall quality, you can dial in.
What to buy first (so you’re not stuck mid-semester)
Here’s a small “classroom maintenance kit” I recommend:
- Spare nozzle
- Extra PTFE tubing (if your printer uses it)
- A filament dryer or dry box (even a simple dryer can help)
- Bed cleaning supplies (IPA/alcohol wipes, microfiber cloth)
- Adhesion helpers (glue stick and/or painter’s tape, depending on your bed type)
- Basic tools: feeler gauge or leveling card, tweezers, flush cutters
Yes, the initial setup cost is usually the biggest chunk. But once the workflow is stable, the per-print cost stays manageable—especially when you plan ahead and reduce waste.
Also, if you’re thinking ahead: the education market is growing quickly, and the tools are becoming more accessible. That’s part of why it’s worth building competence now—students will expect these skills later [1].
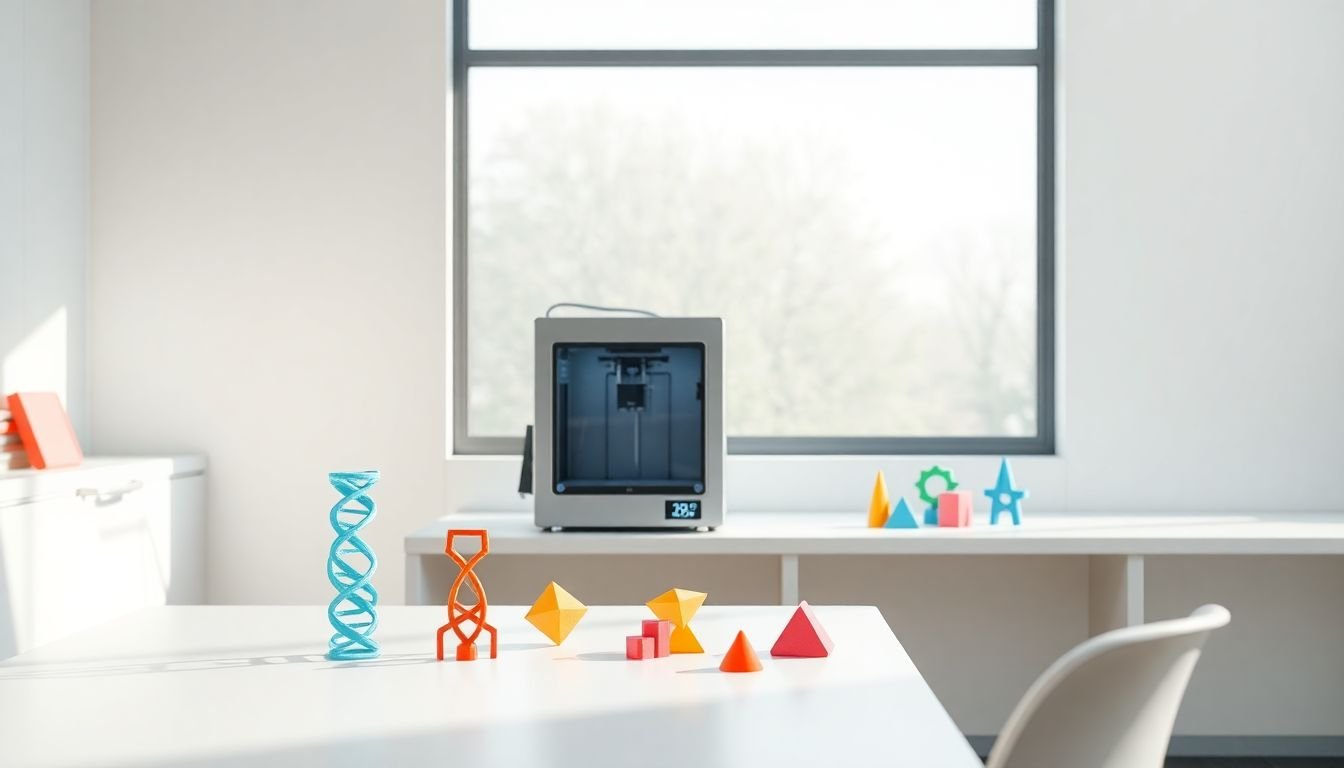
Utilize 3D Printing for Cost-Effective Learning Aids and Prototypes
One of the most practical reasons to bring 3D printing into education is cost control. But here’s the honest part: you only save money if you plan your prints and reduce waste.
Instead of buying expensive models or paying for custom parts repeatedly, you can print custom learning aids—anatomy models, geometric manipulatives, historical artifact replicas, or replacement components—at a fraction of the cost.
Where the “up to 86% less” claim comes from (and how to think about it)
Some studies and industry reports suggest that 3D printing educational toys/aids can reduce costs by up to 86% compared to purchasing ready-made items [4]. In practice, that savings depends on:
- How often you need the item (one-time vs. recurring)
- Material usage and failed print rate
- Whether you’re paying for shipping or commercial licensing
- How much time you spend reprinting when settings are off
Sample cost comparison (a realistic classroom example)
Let’s say you want a class set of simple anatomical or engineering models. Here’s a simple way to estimate the filament cost vs. buying commercial items.
- Filament cost per kg: assume $20–$30/kg (common ranges for PLA/PETG, depending on brand and region)
- Weight of a typical small model: ~20–50 g each (varies a lot)
- Waste factor: if your early prints fail, budget an extra 10–20% material
Example table (not exact, but grounded in classroom math):
- Model A (30 g each), class of 25
- Material used: 30 g × 25 = 750 g = 0.75 kg
- Waste buffer (15%): 0.75 × 1.15 = 0.86 kg
- Filament cost @ $25/kg: 0.86 × 25 = $21.50 (materials only)
- Commercial model estimate: say $10–$20 each → $250–$500 total
That’s why savings can be huge—when you’re replacing items you’d otherwise buy repeatedly. And even if you don’t hit the “86%” number, you’ll still often do better when you’re printing locally and you’re reusing files year after year.
What to print first for cost-effective teaching
Start with items that are:
- Reusable (students will touch them)
- Easy to print reliably (avoid fragile thin parts early)
- Aligned to your curriculum (biology, geometry, engineering)
Examples I’ve seen work well:
- Biology: cell models with removable layers, DNA helix pieces, simplified organ models students can label
- Math: geometric solids and fraction manipulatives (with consistent dimensions)
- Engineering: gear sets, simple couplers, replacement parts for classroom devices
A quick “prototype then teach” strategy
Before you hand a model to a class, print a prototype. Check:
- Can it survive repeated handling?
- Does it fit the lesson timeline (print time + finishing)?
- Are there sharp edges or break points?
After that, you can run a full class set without constantly reprinting.
Integrate 3D Printing into Science, Technology, Engineering, and Math (STEM) Lessons
When 3D printing is part of STEM, it shouldn’t feel like “extra stuff.” It should be the solution to a real problem students are trying to solve.
For example, students can design and print gear systems, bridges, or robot parts, then test how they perform. That’s engineering. That’s iterative design. That’s what you want them practicing.
Project 1 (6th–8th grade): “Bridge That Holds” prototype challenge
Learning goals: understand load, structure, and iteration; measure performance; improve design based on results.
Student artifact: a printed bridge model + a one-page test report.
Materials: PLA, printer + slicer, pre-made “bridge template” files (start with a simple parametric or remixable design).
Steps:
- Day 1: Teach basic design constraints (max height, max overhang, thickness rules).
- Day 2: Students modify the template (change width/beam thickness or truss pattern).
- Day 3: Print prototypes (or teacher prints if you’re short on time; students can still design).
- Day 4: Test: place model across two supports and load with standardized weights (coins, washers, or small sandbag increments).
- Day 5: Iterate: students adjust one variable (not five at once) and reprint.
Assessment (rubric-style):
- Design reasoning (25%): students explain what they changed and why
- Test results (25%): measured, recorded data
- Iteration quality (25%): improvement from version 1 to version 2
- Print quality (25%): functional build, minimal failures
Project 2 (9th–12th grade): “Gear Ratio Calculator + Printed Mechanism”
Learning goals: connect math (ratios) to real-world motion; practice CAD/CAM workflow; debug design issues.
Student artifact: a printed gear mechanism + a short explanation of ratio and expected vs. actual performance.
Steps:
- Students calculate gear ratios for a target output speed (using a simple formula).
- They design a gear set (or use a gear generator) and export the model for printing.
- They print and assemble the mechanism.
- They test motion and record differences (slippage, friction, alignment).
- They revise the design based on what failed.
What students love here is that it’s not just “math on paper.” It becomes a physical system they can feel.
If you want to start small, begin with beginner-friendly tools like Tinkercad and move toward more advanced CAD later. The market growth and increasing availability of tools also means you’ll find more teaching resources over time [1].
Develop Creative Art and Design Projects with 3D Printing
3D printing isn’t only for STEM. In art, it’s a fantastic bridge between creativity and real design constraints.
Students can design sculptures, jewelry, cosplay accessories, textured plaques, and relief art. And yes—when they can hold what they designed, engagement goes way up.
Project 1 (all levels): “Personalized Wearable Tag” design + finish
Learning goals: scale, symmetry, texture design; understanding how thickness affects strength.
Student artifact: a printed tag/pendant or keychain with a finished surface.
Steps:
- Teach a design rule: keep thin parts thicker than your printer can reliably handle (start with a minimum thickness like 2 mm for early projects).
- Students choose a theme (sports, animals, favorite symbols).
- They design in Tinkercad using simple shapes and text.
- Print with consistent settings (0.2 mm layer height, 3 walls, 15–20% infill).
- Finish: students sand edges and apply a simple protective clear coat (if your school allows).
Assessment criteria: design clarity, readability (text/symbols), durability, and craftsmanship.
Project 2 (upper grades): “Texture Relief Sculpture”
Learning goals: explore pattern, negative space, and surface design; connect art principles to 3D form.
Student artifact: a relief sculpture or wall plaque.
Steps:
- Give students a texture prompt (topographic lines, geometric pattern, nature motif).
- Students create a relief model with depth constraints (avoid ultra-thin walls early).
- Print in batches so students aren’t waiting forever.
- Students write an artist statement: what they intended, what went wrong, what they improved.
One reason this works so well: you’re teaching design thinking, not just “button pushing.” And you don’t need expensive software to get good outcomes. If anything, Sculpteo can be a helpful reference point for students who want to see how different finishing processes change the look of a model.
Integrate 3D Printing into Programming and Coding Lessons
Coding + 3D printing is one of those rare combinations where students immediately understand why the code matters. It’s not abstract. They write something → it becomes a model → they print it → they measure it.
Project 1: Parametric “Code-Generated Shapes” (OpenSCAD)
Learning goals: variables, loops/logic, geometry understanding, debugging.
Student artifact: a set of printed shapes generated from code.
Steps:
- Introduce variables: “height,” “radius,” “wall thickness,” “pattern size.”
- Students write or modify OpenSCAD scripts in OpenSCAD to generate a shape family.
- They export STL files and print a small set (like 2–3 variations).
- They compare results: does the printed output match the expected dimensions?
Assessment: code correctness, explanation of variables, and a short reflection about mismatch causes (tolerances, slicer settings, shrink/expansion effects).
Project 2: “Algorithmic Keychains” using simple scripts
Learning goals: algorithmic thinking, repeatability, and iteration.
Student artifact: a printed keychain with a generated pattern (e.g., randomized or rule-based).
Steps:
- Students start with a parametric design (or a basic generator concept).
- They write code that changes pattern parameters (count, spacing, rotation).
- They generate multiple versions, then choose one to print.
- They document what they changed and why.
In my experience, this approach works really well because it supports both creative and analytical students. The “tangible output” keeps everyone motivated.
Also, many affordable classroom printers work with free open-source slicing tools, which makes it easier to keep costs down while still giving students a real workflow.
FAQs
3D printing builds objects layer by layer from a digital model. In a classroom, the key concepts are the workflow (design → slice → print), the most common settings (layer height, infill, supports, temperatures), and a simple troubleshooting mindset so failures don’t derail your lesson.
Start with a printer type that matches your constraints. For most schools, FDM is the easiest entry point. Then pick software that supports beginners (design and slicing). The real test is whether you can maintain it—parts, tutorials, and reliable setup matter more than marketing specs.
Use 3D printing to solve a specific learning problem. Students can design prototypes, create models that support understanding, or produce finished objects that demonstrate skills. The best projects include a test step and a simple iteration cycle so students learn from results.
Use digital design tools students can access from home and have them submit STL files or screenshots of their sliced preview. You can run printing sessions at school and distribute printed parts later, or schedule timed pickup/drop-off. Virtual demos and structured check-ins help students stay on track even when they can’t physically print at home.