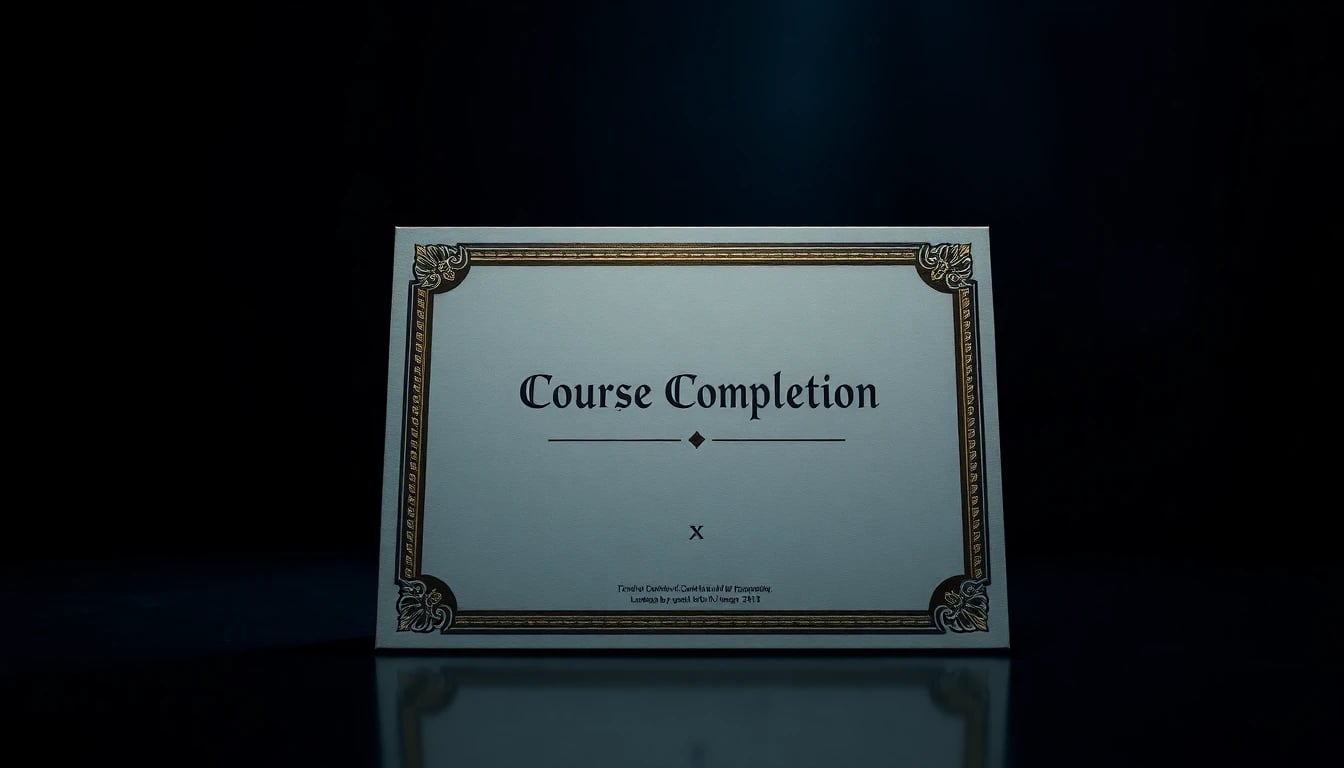
Course Completion Certificate Design (2026): Editable Templates
⚡ TL;DR – Key Takeaways
- ✓Use a strict must-have checklist: issuer, course title, %NAME%, completion date, certificate ID, and authorized signature
- ✓Build visual hierarchy with practical type-size ranges (title ~15–30pt, name ~30–50pt) and a 60/30/10 color rule
- ✓Make certificates verifiable: QR code + consistent records + (where possible) secure digital signatures
- ✓Design for readability and printing: high contrast, clean spacing, export as PDF/JPEG, and avoid tiny fonts
- ✓Choose tools by workflow: Canva for fast editable templates, Adobe Express for polish, and LMS upload support
- ✓Use “completion proof” fields (e.g., %DURATION%, %AWARDED_SCORE%) to create a real sense of achievement
- ✓Implement template customization once, then scale via certificate automation for batches
Certificates of completion are very important for trust — and most teams design them like they’re decoration
A certificate of completion is a trust artifact, not a graphic. If someone can’t verify it, or the details are hard to read in print, the whole thing quietly loses credibility.
I’ve shipped certificates for online course cohorts, workshops, and internal training. The ones that get shared on LinkedIn are usually the ones that are clear, verifiable, and consistent across designs (not the prettiest ones).
What a completion certificate must include (no fluff)
Include the essentials every time: issuer/organization name (plus logo), course title, the recipient’s full name (%NAME%), and completion date. Then add a certificate ID so you can track and verify it later.
Add authorization in a way that matches your process: instructor signature (real signature scan) or a digital authorization method. If you’re using a statement of achievement, tie it to a real requirement like passing above a threshold (for example, %AWARDED_SCORE%) or meeting a completion rule.
- Issuer — organization name and logo at minimum.
- Course details — course title and (optionally) course duration.
- Recipient — full name shown prominently via %NAME%.
- Timing — “Completed on” / “Awarded on” formatted consistently.
- Verification — certificate ID plus QR verification and records.
- Authorization — instructor name/title and signature (or digital authorization).
Where course completion certificate design shows up
Course completion certificate design shows up everywhere: online courses, training programs, workshops, and cohort-based learning. The common failure mode is treating each cohort like a brand-new project.
Instead, keep your layout and variable fields consistent so learners recognize the format instantly. Deliver the completion certificate via email, LMS upload, and downloadable PDF/JPEG for easy sharing.
When I see a certificate that’s different every time, I don’t assume “creative.” I assume “unstructured.” That’s not a vibe you want attached to your credibility.

Attractiveness and Professionalism without overdesign — yes, you can make it look premium fast
Branding isn’t only color. The perceived value comes from disciplined typography, clean spacing, subtle borders, watermark-style backgrounds, and a layout that feels intentional.
Most free templates fail because they pack too many decorative elements and then squeeze the real information into tiny text. You want elegance with restraint, not busy clutter.
Branding elements that elevate perceived value
Go beyond color with brand-specific fonts, consistent icon style, and a reliable border treatment. A subtle emblem, a thin line system, and a watermark background can be enough to make a certificate of completion feel “real.”
Where people overdo it: they add textures, shadows, and gradients everywhere. That looks fine on screen for a minute. Then you print it, compress it to JPEG, and the contrast falls apart.
- Logos — top placement with clear padding.
- Fonts — choose 1–2 families and stick to them.
- Borders — thin, consistent line weight. No random corners.
- Watermark backgrounds — very low opacity; test legibility.
- Stamps — only if your verification workflow supports it.
Color + spacing system you can reuse
Use the 60/30/10 color rule to keep your palette balanced: about 60% primary (background/major blocks), 30% secondary (support areas), 10% accent (certificate ID, headings, QR label).
Contrast should come from size, weight, and style—not from extra effects. If your primary text is already dark and your background is light, don’t hide it behind a gradient.
| Design Decision | What to Do | What Fails in the Wild |
|---|---|---|
| Color balance | Apply 60/30/10 and limit accents to key fields | Multiple accents fight each other (especially on mobile) |
| Contrast | Build contrast with typography hierarchy | Relying on gradients or low-contrast colors |
| Spacing discipline | Consistent padding around logos and blocks | Random spacing that breaks with long names |
Readability and Clarity across devices and print — your design must survive screenshots and paper
Good design is readable in 5 seconds. Learners shouldn’t squint to find the course completion certificate fields: name, course, date, and signature.
This is where I’m blunt: if you can’t print it and still read certificate ID and dates, your certificate doesn’t earn trust.
Text hierarchy that learners can scan in 5 seconds
Use practical size targets that match how certificates are actually viewed. A reliable starting point: title ~15–30pt, recipient name ~30–50pt, details typically ~15pt, and dates/signatures/branding ~10–25pt.
Make the focal points obvious: the course completion certificate headline, the course title (%COURSE NAME%), and the recipient name (%NAME%). Everything else supports those anchors—no exceptions.
- %COURSE NAME% — readable and complete (no truncation surprises).
- %NAME% — biggest element besides the certificate headline.
- Details — completion date and course duration should be easy to locate.
- Verification — certificate ID must be readable even when printed small.
Avoid the common design mistakes I’ve fixed
Don’t break readability just to make the layout “feel modern.” The two mistakes I fix most often: tiny fonts for certificate ID and dates, and low-contrast gradients that fail accessibility tests.
Also, watch for long names. A design that looks perfect with “Sam Lee” can wrap messily with “María Fernanda Rodríguez-Santos.” That’s not a theoretical problem; it shows up in batch exports.
One time I shipped a certificate with a beautiful background pattern. It looked premium on my monitor. Two days later, the ID and date were basically unreadable in the PDF that learners downloaded. After that, I started treating print contrast as a requirement, not a suggestion.
Visual Impact: layout, hierarchy, and verification — the certificate must prove itself
Your layout needs a job description. It should guide the eye from issuer → course completion certificate headline → recipient name (%NAME%) → completion info → authorization and verification.
Most certificates fail because they either hide the verification details or make them too small. If it’s not verifiable, it’s not a credibility document.
Layout blueprint for a compelling completion certificate
Plan placement intentionally. Start with the issuer logo at the top, then a clear headline (example: “Certificate of Completion”), then center/primary the recipient’s name (%NAME%) and the course title (%COURSE NAME%). Add “Completed on” / “Awarded on” near those.
Include the proof fields your workflow can actually support: certificate ID, course duration (%DURATION%), and optionally a score line (like %AWARDED_SCORE%) plus a short achievement statement that recognizes the milestone.
- Top — organization name and logo.
- Center — certificate headline + %NAME% (largest).
- Supporting — %COURSE NAME% and completion date.
- Bottom blocks — instructor signature block and certificate ID.
- Optional — %DURATION% and %AWARDED_SCORE% for sense of achievement.
Make it verifiable with QR code + records
Add a QR code that links to a verification page or database entry. The point isn’t fancy tech—it’s reducing friction so a third party can confirm the certificate fast.
Maintain issuance records for auditability. Your automation logs should store certificate ID, recipient name, course title, issue date, and the verification URL (or lookup key). And keep the certificate ID formatting consistent so the QR lookups never break.
I care less about QR aesthetics and more about whether it resolves correctly 6 months later. Learners scan it, recruiters scan it, and nobody wants to get redirected to an error page.

Editable course completion certificate templates (free + customizable) — choose tools based on workflow, not vibes
Templates are only useful if you can edit them quickly and repeatedly. For me, the real question is: how do you handle variable fields like %NAME%, %COURSE NAME%, and %DURATION% without breaking layout?
In 2026, you should expect editable templates, batch exports, and verification integration. Anything less becomes manual admin work the moment you scale.
How to choose a template tool: Canva, Adobe Express, Renderforest
Canva is the fastest workflow for editable, customizable templates and export-ready PDFs/JPEGs—especially when you run frequent batches. It’s practical when your team needs speed and basic control without deep design engineering.
Adobe Express is strong if you care about typography controls and professional brand-heavy designs. You’ll usually get cleaner typographic decisions with less fiddling once the template is set.
Renderforest and similar platforms can be helpful if you want motion-friendly assets (optional for video certificates). For pure completion certificate design, they’re often extra complexity.
| Tool | Best For | Workflow Reality |
|---|---|---|
| Canva | Fast editable templates, batch exports as PDF/JPEG | Great for customization and consistent spacing once you lock the master layout |
| Adobe Express | Polished typography and brand-heavy templates | More control, slightly more time to set up the first template |
| Renderforest (optional) | Motion-friendly certificates | Useful when “certificate as video” is part of your process |
Specialized certificate platforms for scale and automation
If you’re running many cohorts, you’ll want specialized certificate platforms or LMS-integrated approaches. Tools like iSpring Solutions (LMS-friendly patterns), Certifast, Certifier, CraftMyPDF, and similar services are commonly used for structure and scale.
What matters is certificate automation features: template customization plus variable fields (%NAME%, %COURSE NAME%, %DURATION%, %AWARDED_SCORE%) and bulk generation. The moment you generate dozens or hundreds of certificates, automation beats manual editing every time.
- Variable fields — placeholders that map cleanly to real data.
- Bulk generation — no one should export certificates one-by-one.
- Export formats — PDF for LMS upload, JPEG for sharing.
- Verification hooks — stable certificate ID and QR mapping.
A quick workflow I use for template customization
- Build the master layout once — set safe zones, lock alignment, and define where the logo, %NAME%, and verification elements go.
- Define variable fields and placeholders — map %NAME%, %COURSE NAME%, %DURATION%, and optional %AWARDED_SCORE% to real data placeholders.
- Test with 3 real profiles — short name, long name, and one “weird” course title. You’re testing wrapping and spacing under pressure.
- Export and verify QR + certificate ID integrity — scan the QR on the exported PDF/JPEG and confirm the certificate ID lookup matches the record.
Frequently Asked Questions — the stuff teams always ask after the first batch
Most certificate problems show up after delivery. Learners download the PDF, share it, and someone asks a question your template didn’t anticipate.
Here are the answers I give repeatedly, because they’re based on issues I’ve seen in real certificate workflows.
What’s the best size and layout for a certificate of completion?
Use clear visual hierarchy: large certificate headline, biggest recipient name, then consistent spacing for course completion certificate fields. Keep the course title (%COURSE NAME%) readable and centered where it supports recognition.
Test readability at actual export resolution. A PDF export that looks crisp in design mode can become soft after compression. If your text turns gray or fuzzy, learners will blame your credibility.
Can I make an editable course completion certificate for an online course?
Yes, as long as your tool supports editable templates with variable fields. Canva is often the quickest path; certificate platforms are better when you need bulk generation and consistent layout at scale.
Design the certificate with placeholders for %NAME%, %COURSE NAME%, %DURATION%, and optional %AWARDED_SCORE%. If you skip placeholders, you end up manually editing every certificate, and that’s how mistakes happen.
Do I need a certificate ID and QR code for verification?
A certificate ID is strongly recommended for tracking and trust. It’s the anchor that keeps your records consistent across batches and prevents “which certificate is this?” confusion.
QR codes improve verification speed. Just make sure the verification page stays up-to-date and the certificate ID lookup matches what’s printed on the certificate.
Are free certificate templates actually good for professional design?
Free templates can work if you customize branding, typography, and required fields. The problem isn’t free—it’s that generic templates often ignore readability and verification needs.
Avoid generic layouts with low contrast and tiny details for certificate IDs and dates. Professional design comes from discipline, not cost.
Which tools are best for certificate design and exports?
Canva is usually the best starting point for fast editable templates and clean exports. Adobe Express is strong for polished typography and brand-heavy styles.
For scale, consider certificate automation tools that support variable fields and bulk generation. It’s not about having more features; it’s about reducing manual steps.
How do I upload certificates to an LMS reliably?
Export in LMS-friendly formats, typically PDF. Then ensure your file names map to the recipient record so staff don’t have to rename dozens of files.
If your LMS supports it, attach metadata and verify certificate IDs match your verification entries. The goal is zero ambiguity when someone checks proof later.
Wrapping Up: build once, then scale completion certificate design
Stop treating certificates like one-off designs. Build once with a master layout, then scale via certificate automation so every learner gets the same quality and the same verifiability.
That’s how you protect trust while keeping admin time under control. And honestly, it’s how your certificate program earns credibility instead of skepticism.
Your next steps (practical checklist)
- Confirm your must-haves: issuer/logo, %COURSE NAME%, %NAME%, completion date, certificate ID, and authorized signature.
- Apply a repeatable design system: hierarchy (title/name/details), 60/30/10 colors, and readability-first spacing.
- Add verification: QR code + maintained records, then export PDF/JPEG for sharing.
- Test with real data: long names, odd course titles, and the maximum number of characters you expect.
Where AiCoursify fits for course teams
AiCoursify fits when you’re standardizing certificate workflows. If you want to reduce manual work, it helps you standardize template fields and generate certificates consistently for each online course, training, or workshop cohort.
Think “template customization + certificate automation” rather than “designing again every batch.” And when learners share certificates, the consistency reads as professionalism—which is exactly what you want.
Certificates aren’t where you should experiment. They’re where you should systematize. That’s how credibility scales.
