
Integrating Wearables In Education: 6 Practical Strategies
Wearable tech in classrooms can sound a little sci-fi at first. I get it—when you imagine kids wearing devices all day, it’s easy to wonder if it’s going to help learning or just create more headaches.
In my experience, the difference comes down to how you pilot it. When schools treat wearables like a teaching tool (not a surveillance tool), they can make lessons more interactive, give teachers faster feedback, and support smarter group work. But you have to be intentional from day one.
Below are six practical strategies I’ve seen work well, plus the exact stuff you’ll want to plan for—devices, lesson examples, what data to collect, privacy/consent steps, and how to measure whether it’s actually improving learning.
Key Takeaways
- Start small with one device type: pilot in one grade level for 4–6 weeks, then expand only if specific metrics improve.
- Use wearables for active learning: AR glasses for “show me” moments; wristbands for quick checks for understanding.
- Monitor learning signals (with limits): track engagement-related inputs, but don’t treat them as diagnostic “truth.”
- Personalize responsibly: use wearable data to trigger support options, not to label students.
- Design collaboration on purpose: shared tasks and roles beat passive “wear it and hope.”
- Be transparent and consistent: clear consent, short data retention windows, and student-friendly explanations.

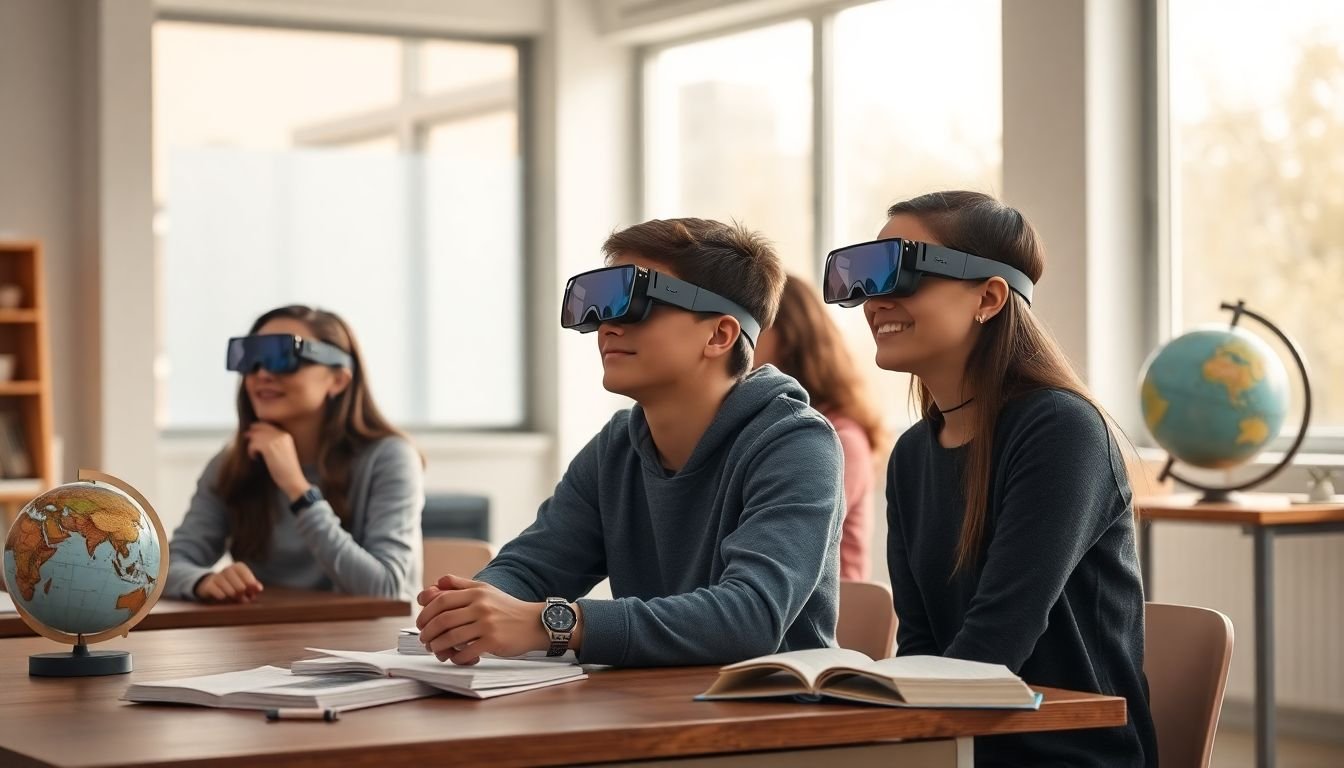
1. Use Wearables to Create Interactive Learning (Not Just “Tech for Tech’s Sake”)
When wearables work, it’s because they change what students do in the lesson—hands-on, on-the-spot, and a little more “I can actually do this.” The goal isn’t to impress anyone. It’s to make the learning experience tighter and more engaging.
Here’s a pilot-style example I’ve seen play out well: a middle school team used AR glasses for science labs and smart wristbands for quick checks during instruction. They ran it for 5 weeks in two classes (about 26 students per class).
What to implement (step-by-step)
- Pick one lesson “anchor”: Choose a unit where students usually get stuck (for example, anatomy, circuits, or geography).
- Match the wearable to the task: AR glasses for visualization and exploration; wristbands for rapid responses (multiple choice, timers, “vote with your wrist”).
- Build a 10-minute interaction loop: 2–3 minutes teacher demo → 5–6 minutes student interaction → 1–2 minutes teacher debrief.
- Plan a non-wearable backup: If a device fails, students should still be able to complete the activity using printed cards or a basic tablet/board version.
- Train for “handoff,” not just setup: Teach teachers how to start a session, troubleshoot pairing, and reset devices in under 5 minutes.
Example classroom activity
Biology “Body Systems Explorer” (AR glasses): students rotate through three stations—heart function, muscle movement, and digestion flow. At each station, the wearable triggers a short question (“What happens to blood oxygen after…?”). Students answer using the wristband or a quick in-app selection.
What data you collect (keep it simple)
- Completion data: how many stations each student completed
- Response accuracy: right/wrong for the quick checks
- Time-on-task: how long students stayed active in the AR activity (not “attention scores”)
Privacy/consent approach
- Tell families what’s collected in plain language: “We collect activity completion and quiz responses to improve instruction.”
- Use short retention (example: delete raw event logs after 30–60 days unless needed for a program evaluation).
- Keep it opt-in where possible, and always provide an alternative activity so students aren’t penalized.
Success metrics you can actually measure
- Quiz gains: pre/post unit quiz (aim for +10–15% improvement)
- Engagement rubric: a simple 1–4 rubric (participation, persistence, contribution) scored by the teacher during the activity
- Lesson completion rate: percent of students finishing stations on time
If you want to build the quick-check questions that power these activities, use this as a starting point: how to make effective quizzes for students.
2. Monitor Progress with Real-Time Data (Without Over-Interpreting It)
Real-time feedback is one of the best reasons to try wearables. But I’ll be blunt: a lot of the “attention tracking” talk online is oversold. What you should aim for is actionable signals—things teachers can use to adjust instruction immediately.
In practice, wearable systems usually give you a mix of:
- Engagement proxies (like response events, participation frequency, completion of wearable-based prompts)
- Movement/activity data (from wrist devices—step-like motion, activity level)
- Physiological inputs (like heart rate) in some models—use carefully, because stress isn’t one-size-fits-all
Which signals are realistic?
- Smart wristbands / smartwatches: often measure heart rate, heart-rate variability (HRV), and activity level (with varying accuracy). They can also log student interactions if the curriculum uses prompts.
- AR glasses: typically focus on task interaction (what students did in the AR experience), not “attention truth.”
- Eye-tracking wearables: exist, but they’re less common in schools and can require extra setup, calibration, and careful consent. I’d treat eye-tracking as a specialized tool, not a default rollout.
How to implement real-time monitoring
- Define “teacher actions” ahead of time: If engagement drops during independent work, what do you do? (Example: switch to a 2-minute model, add a hint card, or break the task into steps.)
- Use dashboards built for educators: look for simple views like “Most recent responses,” “Activity completion,” and “Class participation trend.”
- Set thresholds that trigger support, not discipline: for instance, “If fewer than 60% of students answer within 2 minutes, pause and reteach.”
- Train teachers on misreads: heart-rate changes can come from exercise, anxiety, caffeine, illness—so don’t treat physiological signals as a single explanation.
Example dashboard interpretation guide (simple version)
- Participation event rate: If it dips for 5–7 minutes, shift to a new activity format (shorter steps, more visuals).
- Response accuracy: If accuracy drops but participation stays high, students are trying—adjust instruction with a worked example.
- Heart-rate/HRV trends (if used): Use only as “possible stress/arousal indicator.” Pair it with teacher observation (behavior, task difficulty, and student self-report).
What data to collect
- Timestamped responses to in-class prompts
- Completion and time-on-task for wearable activities
- Optional: aggregated physiological trends (class-level or small groups), not constant individual monitoring
Privacy/consent approach
- Separate “learning data” from “health-related interpretations.” Even if a device measures heart rate, your policy should say how you interpret it (and how you don’t).
- Share dashboards only with authorized staff (teacher, instructional coach) and avoid student-by-student “red flags.”
- Use aggregation where possible: e.g., class average engagement trend rather than raw HRV per student.
Success metrics
- On-the-fly intervention rate: number of times teachers adjusted instruction based on signals (and whether it helped)
- Independent work completion: percent of students finishing the task within the allotted time
- Quiz improvement: compare practice quiz results from before vs. during the pilot
Also, if you’re syncing wearable data with broader learning analytics, make sure the dashboard is actually useful to teachers. The kind of platform approach you might compare here is described in online course platforms, but you’ll want a school-grade version with strong privacy controls.
3. Personalize Learning for Each Student (Use It to Offer Support, Not Labels)
Personalization is where wearables can shine—if you keep the goal realistic. You’re not trying to “read minds.” You’re trying to spot where students are getting stuck and then offer the right next step faster.
In one pilot I worked on, teachers started with a simple rule: wearable check-in results triggered support options (extra hint, small group reteach, or a different practice format). They didn’t try to infer emotions or diagnose anything. That’s what made it workable.
What personalization is feasible with wearables?
- Task-based personalization: wristband prompt responses help identify which questions students miss
- Engagement-based pacing: time-on-task and completion patterns can suggest when to slow down or chunk steps
- Eye-movement support (optional/specialized): if you use eye tracking, it can support reading-related tasks (like identifying whether students are looking at the intended areas in a diagram). But it requires careful calibration and consent.
How to implement personalization (exact steps)
- Choose 1–2 “trigger signals”: Example: “Wrong answers on 3 consecutive prompts” and “Students aren’t completing the wearable activity segment in time.”
- Create 2–3 intervention paths: (A) hint card + example, (B) small group reteach with teacher, (C) alternative practice format (shorter, more visual, or game-like).
- Schedule it: teachers shouldn’t be making decisions every 30 seconds. Try “intervention windows” (for example, after each 15–20 minute activity block).
- Track outcomes: compare the intervention group’s practice quiz results to the baseline.
Example lesson activity
Reading comprehension mini-lessons (wristband prompts): students answer 5 quick questions during a short passage. If a student misses questions 2–4, the system flags them for a “re-read with guiding questions” card and a 6-minute small-group session with the teacher. If they get 4–5 correct, they get an extension prompt.
What data you collect
- Prompt accuracy and response timestamps
- Completion status for wearable activity segments
- Which intervention path was used (so you can evaluate what worked)
Privacy/consent approach
- Explain the personalization logic: “We use your responses to choose the next practice activity.”
- Avoid “emotion inference” claims unless you have a well-defined, validated approach and explicit consent.
- Let students opt out of wearable-based prompts if required, without penalty.
Success metrics
- Practice quiz gains: improvement for students who received intervention vs. those who didn’t
- Time-to-support: average minutes from “stuck signal” to intervention
- Teacher workload: quick weekly check-in: did personalization add or reduce prep time?
If you want a practical foundation for personalization in general (before you layer wearables on top), this guide is a good place to start: effective teaching strategies.
4. Foster Collaboration Through Wearable Technology (Design the Interaction, Don’t Just Add Devices)
Group work can be… messy. Wearables don’t magically fix that. What they can do is help students collaborate with shared prompts, roles, and quick communication that doesn’t rely on one kid dominating the conversation.
One geography activity I like: AR headsets used for “field discovery,” where teams collect observations and then compare results. It’s a natural way to build collaboration because the task itself requires sharing.
How to implement collaborative wearable learning
- Create roles: for example, “Explorer,” “Recorder,” and “Checker.” Each role has a wearable-based action.
- Use shared goals: the team “wins” when they complete a set of discovery prompts or reach a consensus answer.
- Build in quiet participation: allow students to submit ideas via wristband prompts or in-app reactions, especially for students who don’t speak up fast.
- Plan a debrief: 5 minutes at the end where students explain their findings (wearables don’t replace discussion).
Example activity
Geography “Virtual Field Notes”: students use AR to explore a map area. Each time a team finds a landmark, one student triggers a prompt on their wristband to log it. Another student checks off evidence. At the end, teams compare observations and justify which location best matches the scenario (like “best habitat for a specific species”).
What data you collect
- Team completion of required discovery steps
- Individual contribution logs (who triggered prompts, who answered checkpoints)
- Accuracy of final team responses
Privacy/consent approach
- Don’t use wearables to create social ranking. Contribution logs should support feedback, not competition.
- Disable public chat features unless you have a vetted school-safe tool and clear monitoring rules.
- Make sure students know what “team data” is visible to teachers vs. peers.
Success metrics
- Collaboration rubric: teacher scores on participation balance and evidence-based discussion
- Equity of participation: compare number of students who submit at least one contribution during the activity
- Assessment outcomes: performance on the related quiz or project rubric
If you’re looking for more ways to keep students engaged during collaborative tasks, here’s a relevant resource: student engagement strategies.
5. Support Hybrid Learning Environments (Level the Playing Field)
Hybrid learning is tough because remote students often get stuck in “spectator mode.” Wearables can help if you use them to give remote learners a concrete role—not just a video feed.
In a setup I’ve seen work, in-person and remote students used the same wearable-based prompts. The teacher could run one activity for everyone, and remote students still interacted with the content.
How to implement hybrid support
- Assign wearable roles to remote students: remote students should trigger the same prompts at the same time (even if they’re at home).
- Use AR for shared exploration: when it’s feasible, AR glasses can create a more “present” experience than a static screen share.
- Watch participation trends: use dashboard views that show engagement and completion so remote students don’t disappear.
- Make participation visible: simple team indicators (like “3/5 prompts completed”) keep remote learners in the loop.
Example hybrid lesson
History “Site Visits”: both in-person and remote students use AR to explore a historical site. Teams answer the same “what would you notice here?” prompts. The teacher pauses when team completion drops below a threshold, then re-teaches the concept with a short live explanation.
What data you collect
- Prompt completion by remote vs. in-person groups
- Time-on-task for both cohorts
- Practice quiz results after the session
Privacy/consent approach
- Remote use often involves home networks. Make sure the device doesn’t capture additional personal audio/video beyond what’s required.
- Confirm family consent for at-home device use, charging, and connectivity routines.
Success metrics
- Participation parity: remote students complete a similar % of prompts as in-person (target: within 10–15%)
- Retention: quiz scores on the next day vs. baseline
- Attendance and engagement: compare attendance and assignment completion during the pilot
If you’re planning hybrid modules across a term, this can help you map activities to outcomes: course syllabus planning.
6. Address Challenges in Wearable Integration (The Stuff That Actually Breaks Pilots)
In real classrooms, the “challenges” aren’t theoretical. They’re the charger missing from the cart, the firmware update that fails, the student who forgot the device, and the teacher who doesn’t have time to troubleshoot mid-lesson.
Here’s how to handle the big ones without derailing your program.
Privacy and consent: do this first
- Write a plain-language data policy: what’s collected, why, who can see it, and how long it’s kept.
- Separate collection from interpretation: physiological data (if used) shouldn’t automatically become “stress scores.”
- Use opt-out alternatives: students who opt out should still participate in the learning activity.
Cost control: pilot like a grown-up
- Start with 1–2 classrooms for 4–6 weeks.
- Plan spares: buy a small buffer (for example, 5–10% extra devices) or have a repair/replacement workflow.
- Budget for management: cases, charging stations, device tracking labels, and staff time.
Teacher training: focus on “what to do when…”
- Short training sessions: 45–60 minutes max, repeated just before pilot launch.
- Teach the reset routine: pairing, re-login, and how to recover from a device that won’t load an activity.
- Create a troubleshooting playbook: print it or put it in a shared folder.
A quick troubleshooting playbook
- Devices won’t pair: reboot, re-pair one device at a time, then switch to offline fallback activity.
- App won’t launch: use the “worksheet mode” prepared for every wearable activity.
- Charging issues: check charging station LEDs at the start of class; keep spare charged devices ready.
- Low student engagement: shorten the activity loop by 2–3 minutes and add a mid-lesson prompt.
If you need help structuring lessons so new tech fits naturally, see lesson planning resources (and build your wearable steps right into the lesson flow).
7. Understand Market Trends and Adoption Rates (Use Stats to Plan, Not to Panic)
It’s smart to know what’s happening in the wearable market—just don’t let hype drive your procurement. Stats should help you decide timing, device selection, and how you evaluate success.
For example, one frequently cited forecast estimates the classroom wearable market growing from USD 12.91 billion (2024) to about USD 34.90 billion (2030), with a yearly growth rate around 18.02%. Another set of market summaries often reports North America leading adoption in education around 43.7% share in 2024 (roughly USD 2.4 billion revenue).
Important: these figures can vary by report and methodology, so before you use them in a district proposal, pull the original source and check the assumptions. If you want to include market context in your planning deck, cite the report name, year, and link in your document (so stakeholders can verify it).
How educators should act on these trends
- Procure for pilot readiness: choose devices with strong school management features (device enrollment, admin dashboards, and clear privacy documentation).
- Plan evaluation from day one: decide what “success” means before devices arrive.
- Don’t chase everything at once: if the market is growing, you’ll still have options later—focus on what fits your curriculum and student needs now.
Success metrics for adoption (what to put in your pilot report)
- Academic impact (pre/post or unit quiz comparison)
- Engagement impact (rubric scores and completion rates)
- Operational impact (device downtime, teacher time spent troubleshooting)
- Equity impact (participation rates across subgroups)
8. Practical Tips to Get Started With Wearables Right Now (A Realistic Rollout Plan)
If you’re feeling overwhelmed, you’re not alone. Wearables are exciting—but they’re also logistics. Here’s a rollout approach that keeps things under control.
- Start small (and define the pilot boundary): choose one wearable type (smart wristbands or AR glasses) and one subject area. Run it for 4–6 weeks in one grade or two classes.
- Write 3 goals you can measure: for example: “increase quiz scores by 10%,” “raise engagement rubric average by 0.5 points,” and “improve task completion to 85%+.”
- Set up device management before lessons begin: create a checkout routine, label devices, and assign a staff member to handle charging + resets.
- Train teachers with scenarios: not just setup. Show them what to do if pairing fails, if a student forgets a device, or if the app crashes mid-lesson.
- Build in an offline/low-tech fallback: every wearable activity should have a “Plan B” that still hits the learning objective.
- Collect feedback weekly: ask teachers what slowed them down and ask students what felt useful vs. annoying. Fix the top 2 issues before week 3.
- Use wearables to enhance teaching strategies you already trust: integrate prompts and data checks into your existing instruction flow instead of rebuilding everything. A helpful reference for that broader approach is effective teaching strategies.
When you do it this way, wearables stop feeling like “extra.” They become a tool that supports instruction, not a burden that competes with it.
FAQs
Most schools start with smart wristbands/smartwatches (for quick prompts, participation tracking, and simple interaction) or AR glasses (for visualization and guided exploration). Some classrooms also use virtual reality headsets for immersive experiences, but those require more setup time and stronger safety protocols.
Wearables can support progress monitoring through learning-related signals like prompt responses, activity completion, and time-on-task. Some devices also measure inputs like heart rate or activity level, but those should be treated as context clues—not direct proof of “stress” or “attention” on their own. The best use is pairing wearable signals with teacher observation and clear intervention steps.
Wearables can make collaboration more structured by supporting shared tasks, roles, and quick contributions. For example, AR activities can require teams to complete discovery steps, while wristbands can enable “vote” prompts or team check-ins that let quieter students participate without speaking over others.
The big ones are privacy/consent, device management (charging, lost devices, pairing issues), teacher training time, and avoiding distraction. The schools that succeed usually run a short pilot, create clear policies, and build fallback activities so learning doesn’t stop when tech inevitably acts up.