
Digital Illustration Course: Top 12 Best Online Options (2026)
⚡ TL;DR – Key Takeaways
- ✓The best online illustration courses combine drawing fundamentals with modern illustration software (especially Adobe Illustrator).
- ✓AI is now standard for prototyping, but the strongest programs teach “human imperfection” to avoid generic results.
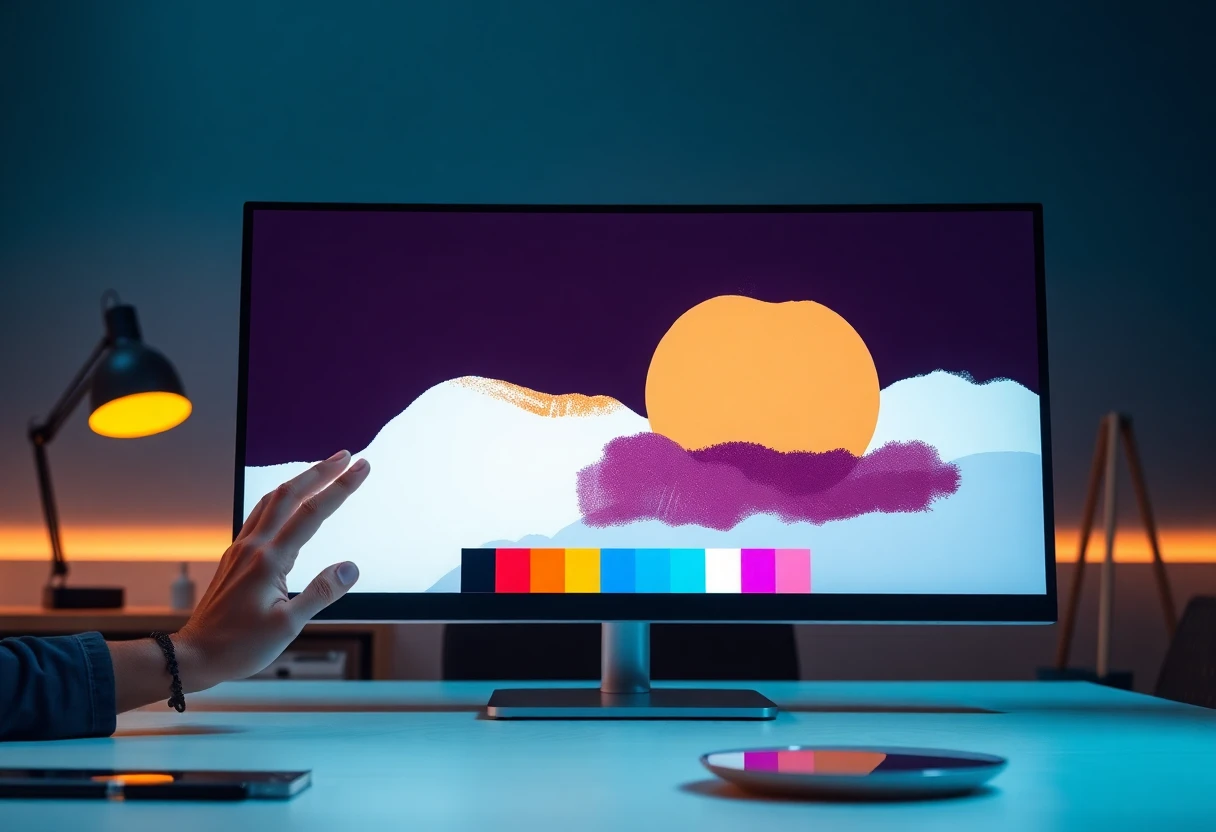
- ✓Micro-textures, deep/vibrant palettes, and soft 3D are 2026 trends that increase viewer engagement.
- ✓Modular illustration kits (characters/props) help you build a consistent portfolio across multiple projects.
- ✓Look for courses with portfolio deliverables: character design, concept art, storyboarding, and brand illustration.
- ✓Certificates matter—but only if they come with structured critique, feedback, and real-world practice.
- ✓If you’re a beginner, start with drawing + sketching routines and only then add advanced character/manga pipelines.
10 best online illustration courses: What’s actually worth it
A great digital illustration course should teach you a repeatable workflow, not just how to click buttons in one app. In 2026, the top online illustration courses blend human sketching with AI acceleration and still push you toward professional-quality output. If a program can’t get you to a finished, export-ready piece on a tight timeline, it’s probably “watching content,” not learning.
My selection criteria (built from real course testing)
I evaluate courses using a workflow test: can you recreate a professional-quality illustration end-to-end within a week? When I tested programs a few times over the years, the ones that impressed me weren’t the most “aesthetic.” They were the ones with clear stages and checkpoints.
I prioritize sketching-to-rendering instruction, not illustration-software button pushing. I’ve sat through too many lessons where the instructor starts coloring immediately, and students never learn how to lock in proportion, gesture, value structure, and edges.
- Clear deliverables: character design sheets, logo design variants, storyboarding frames, and final exports for web/print.
- Process visibility: you should see multiple versions (thumbnail, sketch, tight sketch, paint/ink, polish), not only the final.
- Critique or graded assignments: even lightweight rubrics beat “good job!” feedback.
- Modern pipeline coverage: at least basic vector work in Adobe Illustrator when branding is involved.
Beginner-to-intermediate ladder (no tool overwhelm)
The ladder matters more than the app. If you’re new, you don’t need 7 tools. You need consistent line quality, stable drawing fundamentals, and a painting/texture routine you can repeat.
Week-1 focus: core drawing techniques, stylus/tablet fundamentals, and line quality that doesn’t fall apart under pressure. Week-2+ focus: painting/texture pipelines plus Adobe Illustrator basics (shapes, vectors, exporting). Only later: optional soft 3D, micro-animations, or game-engine style integrations.
| Course ladder stage | What you learn | Typical deliverable | Why it works |
|---|---|---|---|
| Week 1 | Gesture, proportions, line control, simple value blocks | 1–2 core sketches + one timed study | You build a “drawing engine” first |
| Week 2 | Painting, edges, micro-textures, then basic vector hygiene | 1 finished render + 1 vector asset | You connect sketch → finish → export |
| Week 3–4 | Character design iteration, palettes, and series consistency | Character sheet + 2 expression variants | You start building a portfolio narrative |
| Month 2+ | Optional soft 3D, semi-flat rendering, micro-animations | Animated thumbnail + polish pack | You add “engagement features” without breaking fundamentals |

11 Best Online Digital Illustration Courses
Pick courses by outcome, not by vibes. When people say “best online illustration courses,” they often mean “best production value.” I care about whether the course structure produces a portfolio-ready set of outputs with repeatable steps.
Categories: illustration courses, certificates, and projects
Choose by outcome: portfolio-ready projects vs. short technique modules. Technique modules aren’t bad, but they rarely give you the end-to-end workflow you need for professional-quality illustrations.
Certificates are strongest when paired with feedback. A “certificate of completion” sounds nice, but it won’t get you hired unless you also have structured critique, rubrics, and a portfolio submission milestone. I’ve learned to treat certificates like a system for accountability—not a trophy.
- Illustration courses: full workflow projects (sketch → render → finalize).
- Certificate programs: graded work + rubric feedback + portfolio submissions.
- Project-based tracks: character sets, logo/pattern systems, storyboard sequences.
- Community-assisted cohorts: iteration loops where you can get opinions fast.
Where AI fits (and where it should not)
AI is now standard for prototyping, but your course should teach you what to do after you generate. The best programs use AI for ideation and fast iteration, then push you to refine manually so the final work isn’t generic.
I’m seeing a real hand-drawn revival because viewers can tell when everything looks “too perfect.” Research benchmarks suggest 67% of 2026 illustration trends lean on hand-drawn elements to combat AI generics, and that aligns with what clients ask for in branding and editorial work.
| AI use | Good | Not so good | What to do instead |
|---|---|---|---|
| Ideation | Generate thumbnails, explore compositions | Skip sketching and “render from prompt” | Redraw from your sketch so you own the proportions |
| Color exploration | Try palettes quickly, then commit manually | Rely on one AI palette for the whole piece | Build a palette swatch library and keep it consistent |
| Texture generation | Use as reference, then add hand grain/micro-textures | Let textures look identical across images | Vary noise/grain passes per element (human inconsistency) |
| Finishing | Use AI previews to speed iteration | Final output stays AI-straight | Refine edges, values, and imperfections manually |
AI ethics mini-module should be part of the curriculum: training data awareness, copyright basics, and disclosure norms. When a course includes that, it saves you months of “wait, can I use this?” panic later.
When I first tried to “AI my way” through a portfolio piece, my finals looked impressive… until I compared them to client samples. The differences were subtle, but the client feedback was blunt: it looked like everything came from the same template. That’s when I started treating AI as a sketch partner, not a finish artist.
Recommended courses: Best pathways for different goals
Your goal should decide your course order. If you start with advanced pipelines before you can draw a stable face or hand, you’ll stall. The right pathway is usually boring: sketching fundamentals first, then characters, then rendering systems, then optional modern extras like soft 3D and micro-animations.
For beginners: daily sketching + fundamentals first
Start with daily sketching, not with “digital painting confidence.” Use 10–20 minute sketching prompts to build visual memory for character proportions and hands/faces. If you can sketch it quickly, you can render it later.
Pair sketch practice with one main tool you’ll use consistently: tablet + one illustration software. Switching every week kills momentum and makes your progress impossible to track.
- 10–20 minutes daily for thumbnails and quick studies.
- 1 tool consistency rule: one tablet workflow and one primary app.
- Redraw the same concept twice (first pass fast, second pass more intentional).
For earn-money-from-art goals: branding & illustration systems
If you want to earn money, build systems. Branding work likes consistency: color palette discipline, repeatable illustration logic, and export files that clients can actually use. Prioritize courses that teach logo design variants, pattern design kits, and modular brand assets.
Modular systems speed up your portfolio. Instead of random one-off pieces, you create a cohesive set: characters/props/background elements that reuse your palette and texture rules.
| Money goal | Course outcomes to hunt for | Deliverables you should end with | Why it sells |
|---|---|---|---|
| Logo + brand illustration | Vector discipline in Adobe Illustrator, variants, exports | Logo set (color/mono), icon pack, pattern samples | Clients buy files they can deploy |
| Editorial + web illustration | Color + value consistency, micro-textures, export presets | Series of 6–10 illustrations + web-ready exports | Consistency reads as “professional” instantly |
| Game/webtoon style | Manga/storyboarding pipeline, panel rhythm, character sheets | Storyboard sequence + character turnaround set | It proves you can produce in a schedule |
Add an output checklist: web exports, print-ready files, layered files for collaboration, and a simple licensing/usage notes doc. That last part sounds small until you get your first client question.
Best Illustration Courses & Certificates: how to choose
Certificates don’t matter unless they change your practice. I’m not anti-certificate. I’m anti “completion-only.” In 2026, the certificate courses that earn respect include graded assignments, rubric feedback, and portfolio submission milestones.
What “certification” should include in 2026
A good certificate course includes graded assignments, rubric-based feedback, and a portfolio submission milestone. That means you can point to work and explain what you improved, not just claim you “completed a program.”
Look for current trends baked into projects: soft 3D hero sections, micro-animations for engagement, and stylized realism. Research also notes that educators are adapting curricula toward expression-first outcomes—bold textures and emotional depth—rather than chasing perfection.
- Graded submissions with rubrics you can learn from.
- Trend-aware assignments (micro-textures, deep/vibrant palettes).
- Clear copyright guidance so you know what you can reuse.
Tools checklist: Adobe Illustrator, stylus/tablet, and exports
If your portfolio includes brand work, make sure the course covers Adobe Illustrator foundations: vector shapes, type-to-vector basics, and export settings. A lot of illustration students avoid Illustrator until too late, then scramble when they realize clients want clean vector files.
Confirm student practice with a consistent setup: stylus pressure sensitivity, line control, and shortcuts that reduce friction. If you don’t practice your tools, you’re paying for lessons you won’t repeat under deadline.
| Checklist item | What you should see | Minimum acceptable coverage | Why it matters |
|---|---|---|---|
| Adobe Illustrator | Vectors, type, alignment, exports | Shapes + export presets | Clean deliverables for clients |
| Stylus/tablet workflow | Pressure sensitivity and line control exercises | Short daily drills | Consistent drawing quality |
| Exports | Web, PDF, layered files | PNG + PDF + SVG basics | Portfolio looks “real” |
Finally, export discipline matters. If you only end with a single format, you’ll keep rebuilding assets. Export training should be a core part of the course, not a footnote.

12 Best Online Illustration Courses
Stop treating courses like buffet lines. The best digital illustration course path maps skills to outcomes, so each module pushes you toward the next portfolio deliverable. If you can’t explain what Course 5 builds toward, you’re probably learning randomly.
The 12-course framework: skills mapped to outcomes
Course 1–3: drawing techniques, sketching, and baseline digital drawings. Course 4–6: character design + concept art foundations. Course 7–8: brand illustration (logo design + pattern design).
Course 9–10: manga characters + storyboarding/storytelling pipelines. Course 11–12: advanced rendering, stylized realism, and optional micro-animations.
Where “technical drawing” helps (even for stylized art)
Stylized realism still needs structure: gesture, perspective, and technical drawing basics. The trick is using those foundations early, then removing the scaffolding so the illustration feels alive.
I recommend grid reference early, then remove it during final passes. You’ll get cleaner proportions fast, without freezing your style into a rigid look.
- Use reference grids in sketches, then erase mentally in finals.
- Combine Kline-style exercises with digital inking for control.
- Track perspective confidence by comparing one-page studies over time.
The result: you get stylized art that looks intentional instead of “randomly good.” That’s what keeps you employable.
Technical drawing used to feel like homework to me. Then I took one course that forced gesture + perspective drills before rendering. My stylized work got better overnight, because my proportions stopped fighting my style.
Top 10 ART RESOURCES and COURSES: platforms I’d start with
You don’t need a dozen platforms. You need the right course format: structured projects for Udemy-like learning, clearer learning paths for Coursera, and iterative feedback loops for community platforms like Domestika and Skillshare.
Platform shortlist: Udemy, Coursera, Domestika, Skillshare
Udemy is good for structured project series and technique-heavy classes. Coursera tends to be more formal with certificates when available. Domestika/Skillshare are great for community feedback and fast iteration workflows.
- Udemy: project-based technique practice; often cheaper.
- Coursera: stronger structured paths and certificate formats.
- Domestika: community + creator-led critique patterns.
- Skillshare: quick iteration and focused drills (if you avoid scattering).
What to look for inside any course listing
Check for downloadable resources: brush packs, reference sheets, and modular illustration kits. Resources aren’t just convenience; they reduce the friction between “watching” and “doing.”
Prefer process videos that show decisions and include multiple versions. Finals-only lessons can look amazing but fail you when you need to troubleshoot.
| Listing detail | What it signals | How to verify fast | Outcome you want |
|---|---|---|---|
| Downloads included | Course supports practice | Preview files: brush sheets, reference packs | Repeatable workflow |
| Process includes critiques | Learning loop exists | Look for rubric/assignment wording | Better outputs under pressure |
| Copyright/usage notes | Responsible instruction | Search “rights” or “licensing” in description | Portfolio pieces you can reuse legally |
Verify rights early. It’s cheaper to check before you enroll than to rebuild after you discover you can’t legally display something.
10 great digital art Skillshare classes (and similar)
Skillshare can work—if you stop getting scattered. Most people treat Skillshare like a playlist. That’s how you learn “a bit of everything” and still can’t produce a finished illustration consistently.
How to learn on Skillshare without getting scattered
Pick one track and stick to it. A practical sequence: daily sketching prompts, one focused painting module, then character design basics, then export polish. If you jump between unrelated classes, your line quality and value control never stabilize.
Batch your practice sessions. One day for sketches, one day for rendering, one day for portfolio polish. This rhythm matters more than the teacher’s follower count.
- One week = one deliverable, not five mini doodles.
- Redraw the same concept to measure improvement.
- Document your settings: brushes, palette, canvas size, export settings.
Micro-animations and engagement in short-form learning
Micro-animations help you stand out, especially in thumbnails and social previews. Think blinking eyes, drifting smoke, or subtle lighting shifts—small motion signals that make images feel alive.
Creative Bloq-style examples commonly show those “blink + drift” tricks because they’re easy to implement and easy for viewers to feel. Research benchmarks also suggest micro-textures boost engagement by about 30–50%, and motion usually compounds that effect.
| Micro-animation type | Best for | Effort level | Portfolio payoff |
|---|---|---|---|
| Blinking eyes | Character portraits | Low | High engagement in previews |
| Drifting smoke | Atmospheric scenes | Low–Medium | Feels “alive” instantly |
| Soft lighting pulse | Hero shots | Medium | Strong “polish” signal |
Measure learning impact by tracking before/after engagement on the same post type. If you’re not seeing lift, your motion is probably too subtle—or too random.

The basics: digital illustration workflow that actually scales
Most people fail because they don’t have a pipeline. They start coloring too early, over-detail at sketch stage, or mix vector and raster without a plan. The workflow needs to scale from “study” to “portfolio piece” without breaking your brain.
From sketch to vector/paint: a repeatable pipeline
Block shapes first, then refine edges. Don’t start with “perfect” rendering; you’ll bury composition under detail and lose control of values.
Use stylus/tablet for expressive lines, then choose rendering based on style needs. Vector is great for logo design, icons, and clean brand illustrations; paint is better when you want texture richness and soft realism.
- Folder system: references, drafts, finals, exports.
- One canvas rule: lock canvas size and keep it consistent for series work.
- Value-first mindset: color is the last mile, not the first.
Adobe Illustrator essentials you’ll use daily
Vectors matter when you build brand deliverables. In 2026, courses that include Adobe Illustrator basics help you ship logo design, icons, and clean brand illustration without the “jagged edges” problem.
Color palette discipline is the secret sauce: deep/vibrant palettes with controlled neutrals. Export discipline is equally important: SVG/PDF for crispness, PNG for web previews.
| Illustrator skill | When you use it | What “good” looks like | Portfolio proof |
|---|---|---|---|
| Vector shapes | Logos, icons, clean brand art | Stable edges at any size | Client-ready SVG/PDF |
| Type-to-vector | Typography marks | Editable where needed; converted when required | Clean finals, correct font handling |
| Export settings | Web and print delivery | Consistent artboards and DPI | Less rework after feedback |
If you can’t export confidently, your illustration isn’t finished. It’s just “rendered.”
Introduction to Adobe Illustrator: best-first lessons
Learn Illustrator like a production tool, not a design toy. The fastest route is vector thinking, consistency habits, and texture finishing that doesn’t ruin the “clean” look.
Vector thinking: shapes, type, and consistency
Start with modular shapes and reusable components for character props and UI-style illustration. If you build a small library early, your later portfolio work becomes faster and more consistent.
Practice alignment and distribution until it’s automatic. In real production, time saved on alignment is time gained for rendering decisions and polish.
- Palette library for deep/vibrant and neutral control.
- Alignment presets so artboards stay consistent.
- Export presets so you ship faster.
Add texture without ruining the vector look
Texture belongs as a finishing pass, not as the foundation. Overlay micro-textures (grain/noise) with careful opacity so the output stays human while still feeling stylized and controlled.
Blend modes and subtle opacity help maintain stylized realism. If you’re building brand illustration series, keep texture settings consistent across the set so you don’t “randomly change the mood” between pieces.
| Texture method | Where to apply | Risk | Fix |
|---|---|---|---|
| Grain/noise overlay | Final layer | Too heavy = muddy colors | Reduce opacity and limit to focal regions |
| Micro line texture | Edges and shadows | Over-sharpening | Use soft blending and value checks |
| Texture consistency pack | Across series | Different texture “language” per piece | Lock settings into a reusable template |
Daily Sketching + Skills you’ll gain in a strong course
Skill growth comes from repetition with feedback. A strong digital illustration course pairs instruction with a daily practice loop. Not “someday.” Not “when inspiration hits.” A schedule you can actually keep.
A realistic daily schedule for beginners
10–15 minutes: gesture + quick character thumbnails. 20–30 minutes: one focused drawing technique (hands, faces, or perspective). Optional: 10 minutes of AI-assisted thumbnails for ideation, then redraw manually.
- Gesture builds motion and proportion.
- One technique focus builds control.
- Redraw manually ensures you own the anatomy.
Skills you’ll gain: practical portfolio outcomes
In a good course, you’re not just learning skills. You’re shipping portfolio deliverables. Expect drawing techniques like line quality, proportion control, and perspective confidence.
Character design outcomes should include turnarounds, expressions, and cohesive palettes. Storyboarding and storytelling should become tangible: short comic panels, webtoon-ready layouts, or pitch-deck sequences.
| Skill area | You should practice | Your portfolio proof | Time to notice improvement |
|---|---|---|---|
| Drawing | Gesture, values, edges | Before/after set of studies | 2–3 weeks |
| Character design | Silhouettes, facial structure, outfits | Sheet + expressions | 3–6 weeks |
| Storytelling | Panel rhythm + camera angles | Storyboard sequence | 4–8 weeks |
Character design, Anime art, Concept art, Manga art
Character pipelines are where most students stall. They either copy styles without building underlying design rules, or they don’t produce enough iterations to make the design “stick.” You need a repeatable process: silhouettes, structure, and consistent materials.
Character design pipeline: from silhouettes to sheets
Start with silhouette readability, not with details. Then refine features for emotional clarity—eyes, mouth shapes, and how the head structure supports the expression.
Build a consistent materials set: hair styles, clothing folds, and signature props. Modular systems let your new characters reuse your palette + texture rules so your portfolio feels cohesive.
- Silhouette → feature refinement for emotion.
- Character materials library for speed and consistency.
- Modular palette rules to unify your output.
Anime art + manga characters: storytelling that sells
Story sells, not just aesthetics. Focus on panel rhythm, readable expressions, and purposeful speed lines. If your panels don’t guide the eye, the art doesn’t matter as much.
Practice storyboarding beats to camera angles: wide → medium → close. That sequencing builds clarity and pacing, which are the real “sell” mechanisms in manga and webtoon work.
| Storyboarding element | Goal | How to practice | Portfolio output |
|---|---|---|---|
| Panel rhythm | Control pace | Draw 12-panel scripts weekly | Storyboard PDF + panel thumbnails |
| Expressions | Read emotions instantly | Expression drills on a single character | Sheet with 6–10 expressions |
| Camera angles | Guide attention | Wide/medium/close mapping exercises | Beat-by-beat camera plan |
Keep originality. Avoid copycat posing. Use structure and your own design choices—silhouette and material rules—so your character language doesn’t feel generic.
Concept art: ideation rounds + refinement criteria
Run 3 ideation rounds: mood → composition → details. This prevents the classic concept-art trap where you jump to details too early and kill the range.
Use AI for thumbnails, then judge by composition instead of novelty. You’re looking for clarity and story potential, not “cool randomness.” End with a hero concept and 2 supporting variations for your portfolio.
Brand Illustration: Create Stylized logos, patterns & course-ready assets
Brand work rewards consistency and file discipline. If you want to earn money from art, you need assets that clients can deploy: clean vector marks, repeatable palettes, and patterns that follow real rules.
Logo design you can defend (and reuse legally)
Teach students to document decisions so originality is defendable. That means tracking references and explaining why the final mark works—shape logic, negative space, and type choices.
Include a copyrights mini-checklist before exporting client-ready assets. Deliver versions: monochrome, color, and a small-size simplified mark so it survives real use cases.
- Defensible design decisions backed by notes.
- Copyright mini-checklist before final delivery.
- Multiple versions for real-world usage.
Pattern design + modular illustration kits
Pattern design works best with pre-planned repeat rules. Don’t improvise tiling logic at the end. Create an asset library, test repeats early, and keep edges clean.
Modular kits speed up new projects. Characters, props, and background elements should share a common palette and texture rules so your brand illustration set feels cohesive.
| Kit type | What you include | How it helps | Portfolio result |
|---|---|---|---|
| Character kit | Turnarounds, outfits, props | Consistent design language | 6–12 usable character assets |
| Pattern kit | Tiling rules + swatches | Faster production | Repeat-ready pattern exports |
| Brand prop kit | UI icons, frames, decorative elements | Scales across marketing assets | Social + web-ready set |
Package assets with usage notes so you can build offers later. It’s the difference between “pretty portfolio” and “sellable skills.”
Wrapping Up: pick your digital illustration course (and start this week)
Choose what you can finish. In 2026, the best online illustration courses aren’t the most expensive or the most popular. They’re the ones that match your current skill and push you toward a clear, export-ready portfolio outcome.
A simple decision guide for 2026
If you’re new: choose a course that starts with daily sketching and stable drawing fundamentals. If you want professional-quality illustrations: pick one with graded deliverables and portfolio export guidance.
If you’ll use AI: choose a course that teaches ethics and “human imperfection” finishing, not just prompt workflows.
- Beginner path: sketching + fundamentals first.
- Portfolio path: graded deliverables + export guidance.
- AI path: ethics + manual refinement + imperfection.
My recommendation: build your curriculum with AiCoursify
I built AiCoursify because I got tired of wasting time comparing courses manually and guessing which ones actually fit a workflow. The practical value is simple: you can shortlist best-fit learning paths and compare course structures before you commit.
Pair course learning with a personal checklist: sketch → render → texture → export → portfolio write-up. Track outcomes weekly so you can switch early if the workflow doesn’t click.
If the course doesn’t change my output in 2–3 weeks, I stop. No guilt. I want the fastest path from instruction to finished work.
Frequently Asked Questions
Can artificial intelligence replace learning in a digital illustration course?
AI can’t replace learning in a digital illustration course. It can accelerate ideation, but drawing fundamentals like gesture, perspective, and value control still require manual practice. The best courses use AI for prototypes, then require refinement and critique.
Skills you'll gain from online illustration courses—what are they, specifically?
Expect practical skills like sketching, character design, storyboarding, vector/paint workflows, and portfolio export. Look for projects tied to outcomes—sheets, sequences, brand assets—so your learning isn’t just passive consumption.
Yes. You can start learning for free with digital art resources—what’s the best path?
Start with daily sketching prompts and a single beginner-friendly tool (tablet + one illustration software). Use free tutorials for warm-ups, but move to a structured course when you need critique, assignments, and accountability.
Add a short AI ideation step later, only after you can redraw the concept manually. Otherwise, you’ll memorize outputs instead of learning decisions.
Do beginners need Adobe Illustrator or should they start with something else?
Illustrator depends on your goal. If you want logo design or clean brand illustration, Adobe Illustrator is worth learning early—but basics first. If your goal is characters or manga, start with general digital sketching and transition later when you need vector deliverables.
What about copyrights when using AI or reference assets in illustration courses?
Follow course guidance on originality and licensing, and keep records of references and what was redrawn vs. traced. Treat AI outputs as inspiration unless the course explicitly teaches compliant usage, permissions, and disclosure norms.
How do certificates help you earn money from art?
Certificates help when they come with real projects, feedback, and a portfolio-ready outcome. Hiring and client work depend on evidence of skill—cohesive samples and clear usage rights—so certifications only matter if they come with that structure.
If you want the short version: buy a course only when it produces finished work you can export, critique, and reuse legally.